Thursday, March 29, 2012

Thrifted Thursday! Vintage Vogue Posters

This week's "Thrifted Thursday" features are a pair of vintage Vogue posters that I found recently while thrifting. I was immediately drawn to them and snatched them up as fast as I could! They came with these simple gold frames and that's how they are staying for now. They will probably end up in a bedroom, but for now, are on my mantle in the den hanging with some other thrifted friends, some of my milk glass collection.
The one on the left is titled "Vanity Number"(for sale HERE), and the one on the right is titled "Suggestions for the Hostess" These are taken from Vogue covers in 1916 and 1917, and were designed by Helen Dryden. They have beautiful colors and are in fairly good shape. I believe they were printed in the 70's but I'm not sure.
 The posters alone sell online for more than I paid for the poster and frame, so I'm happy with my purchase! Who knew you could find fun things like this at the Memphis, TN Goodwill!
 Here are a couple of angles to give you perspective of where they sit in the den. It needed a little more sophistication, so these help for now :)
I hope you're having a relaxing day like Riley on the couch over there. He has kind of become part of my decor so I don't bother moving him anymore!

Wednesday, March 28, 2012

Working With What You Have: A Painted Mailbox

My house's mailbox is on the dated side...just your basic black (faded) box and some granny-ish railing supporting it. This is it...not much to look at. It pretty much served as a place for all of the neighborhood dogs to do their business(see large grass-less spots.)


I didn't feel like digging all of that up and buying a new one, so I bought some spray paint,

And some wildflower-looking plants,
And turned it into this:
Here's one minus the dog...
I figure that you shouldn't take your mailbox too seriously, and should have a little fun with it. The bricks that I used as the "flower bed border" were from the backyard.
The support railing got a quick coat or ORB spray paint that I already had, and the numbers and hardware got a coat of copper (also had on-hand). Even the flag got a fresh coat of red.
(Yes I painted a broken number and put it back up there...)
To paint the mailbox, just unscrew it where it is attached to the support and it comes right off. When using spray paint, spray several thin and even coats to get good coverage. It's easy!

One thing is for sure, when giving directions now, all I have to say is, "the first blue mailbox on the left!"
Now if I can just do something about that missing patch of grass...let's just hope the dogs don't decide to use my flowers as the new hot spot to relieve themselves.

Don't forget to come back tomorrow for "Thrifted Thursday!"


Thursday, March 22, 2012

New Weekly Feature: Thrifted Thursday!

One of my passions is finding items while thrifting that I can use in my home, and although I do share some of these things with you, it's usually in passing. I decided to make this a more structured thing, since it is something that is so important to me and is a big part of my decorating style. I also thought that through this feature, I can share some tips with you about thrifting like how to find quality pieces and things not to buy.
I consider thrifting to be shopping thrift stores, yard sales, estate sales, etc... I hope you enjoy my fun finds!! Check back each Thursday for a new installment!

This week's features are my copper cannisters in the kitchen.
I found them at different places and at different times, and I'm still looking for a third. I love their vintage vibe and I even kind of like how they are a little worn. Shows character.
I think they look nice with my fruit bowl. The copper and blue are a nice compliment to one another. One has a flour label, and the other has a coffee label. But that's not usually what stays in either one!

Aren't they charming? I'm hoping they distract from the ugly countertops/cabinets/etc...in the kitchen!
FYI, a natural way to polish copper is by sprinkling salt on a halved lemon, and then rubbing it all over the item in a circular motion. believe it or not these were much more worn before I did this!
Where do you keep your flour, sugar, or other baking essentials? In the cabinet? On the counter? I'd love to know!

Tuesday, March 20, 2012

My Home's Newest Residents: Succulents

Every year around this time, the plants in the garden section at Home Depot quiver in their pots. They see me coming and know that it means certain death for whomever I take home with me. It never fails, I either don't read the plant's sun requirements, forget to water it, or it just dies from fear on the way to my house and I don't realize it until it has been planted. Whatever it is, I kill every single plant I buy.
So this year I thought I would try a more plants-for-dummies approach. I bought some cacti and succulents.
 I'm not sure which is which, but either way they are supposed to be able to live in a well-lit place in my home. We'll see how this goes.
I had two pots that would be perfect. The one on the right I found for $0.59 while thrifting with my mom this weekend (see the cute jeans I found that day HERE), and the one on the left I picked up on the side of the road. It was with my knitting stand, but I went back and picked it up with the car like a normal person (that picks things up on the side of the road).
 I placed two plants in the larger planter, and one in the smaller. Right now they are sitting together in the den on the side table. This will probably change, like everything else around here.
 They are so cute and so far so good (it's been an hour). Maybe I can save my reputation among the Home Depot plants this year. I'm crossing my fingers!
Have any of you had success with these types of plants? Any tips you can offer to me? I would love to hear them!
And speaking of thrifted items, check back tomorrow for the first installment of my new weekly feature, "Thrifted Thursday"! Each week will showcase a different thrift store gem! I'm excited to start sharing these with you!

Monday, March 19, 2012

Accessorizing: How to build a vingette

There are lots of "rules" out there about building a proper vingette, that detail how many items it should include, heights of the items, sizes of items, etc... But I think this all depends on the space in question, the style of the room, and type of items being displayed. I usually play it by ear and build each space as I go, but I do keep a few things in mind:
1. Use varying heights to create interest
2. Use different textures
3. Keep in mind that too many colors will start to look sloppy

With large built-ins like these, accessorizing can be a challenge. So I take it shelf-by-shelf.

I thought I would focus on the right side of the shelves to show you my process. I picked the shelf with some of my milk glass collection.

 I broke this shelf into two sides, the left and the right. Doing this makes them easier to tackle!
I began with one of my favorite pieces in this room, my chinese book ends that I found at a consignment store. The milky blue color was great for the room. I paired their subtle color with some brighter, complimentary-colored books that I own. My grandfather gave me his vintage gardening book a few months before he passed away. Those items pretty much took care of the left-hand side.
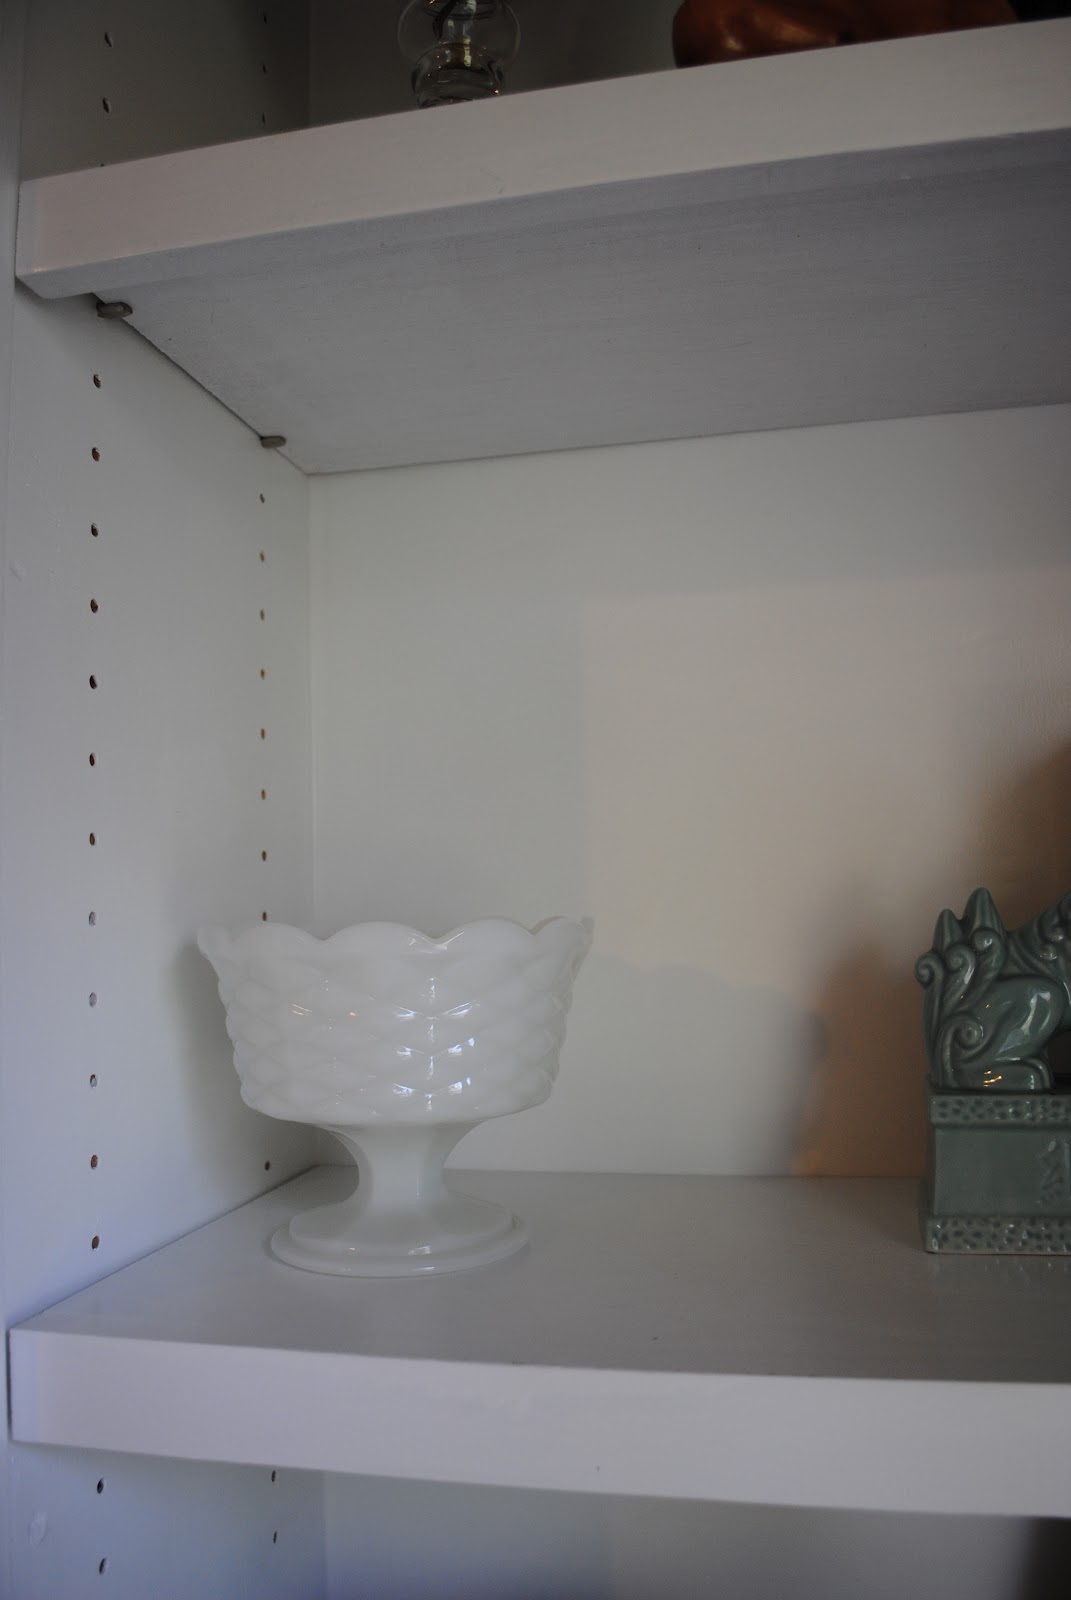
Next I turned to the right side. I decided to use my milk glass to balance out the color with some white so as not to make the shelf too busy. I chose a fairly short and substantial piece first.

Then I went for a taller, more slender piece for some contrast.

Finally, I used an even shorter piece to round out the trio. You could say that I used the pretty standard vignette rules on this side of the shelf (three items, varying in size, similar style).

And this is the final product! By breaking up the shelf into two sections, I didn't get overwhelmed and also didn't under or over accessorize!
I hope this helped you understand my process on this. I hear so often that people don't know where to start, and accessorizing shelves is my number one request when staging, so I know that it can be a challenge! Do you have any spots in your house that you scratch your head over when accessorizing?

Friday, March 9, 2012

Easy, Inexpensive Ways To Freshen Up Your Home For Spring

I am so ready for my yard to start blooming, but nothing too exciting is happening out there yet. So, I made a quick trip to my go-to for easy, inexpensive flowers...Kroger. You would be surprised at their choices and how long they last!
 I picked up this bunch for $3.50. They are sitting on the bedside table that is the match for my console that I painted. This piece needs some help too (see the terribly beat up top), but it's working for now.
I used some floral foam (I keep a big square of it on hand to cut off of), and used this silver julep cup that I bought from Pottery Barn a couple of years ago. I paired that with my two PB Bunnies that I filled with Easter candy (notice how I've already eaten about half of it!!) It's a cute way to decorate for Spring without getting super-cheesy.
Adorable flowers on the cheap!

And quick side-track. You may notice a few changes...since my Great-room wall was re-constructed, my favorite mirror had to find a new home. I stuck it in the entry hall and I LOVE it there! It brightens the whole space!

I needed something under it so I stole the piano bench. I know it's probably not normal to have a footstool under your piano, but it's kind of working for me right now.

On to my second $3.50 bunch of flowers. These are brightening up the dining room. They are sitting in a cute thrift store jar. I love using things other than vases for flowers.

And my cat likes to chew on these...note the little pieces all over the table. Haven't figured out how to fix that yet. She's a big girl and gets hungry, what can I say?
Happy Friday! Now go out and get some flowers to freshen up your weekend!!


Thursday, March 8, 2012

Neutral Nursery

When one of my clients (who has become a close friend) told me that they were expecting, I was SO excited to have the opportunity to work on the nursery! They wanted to use a room that was currently empty with green walls and heavy denim (yes, denim) drapes from the previous owner.
They wanted a neutral room that could transition as their baby (who they found out was a boy) grew, and didn't scream "baby". They also wanted to work with the green walls. Here are a few "after" pics. These are from my phone so not perfect, but I didn't have my camera handy!

They picked out an awesome glider and had custom bedding made. It all looks great, and we just built off of their choices. The custom chevron drapes helped break up the green walls and bring the neutrals up to the ceiling.
The train painting was a custom piece designed by Hillary Butler. You may remember another post with one of her pieces HERE. She does fabulous work, so check out her site!
We wanted art that complimented the room but brought some layers of color and could be used in other parts of the house in the future or in his room as he continued to grow.
The shelves I picked for the walls flanking the large window are covered with punched tin and have a rustic wood top. They were perfect for adding some pieces with personality and pops of color. I chose orange as a secondary color in the room to contrast the beiges, browns, and green walls.
I also chose an end table that can function as a bedside table as he gets older.
I designed this large wood piece for above the changing table, and added additional color washes over the wood. I used the orange again to personalize the piece with an initial. The rustic feel helps balance out the newer, sleek furniture pieces in the room.
A wider shot for reference and a view of the matching shelf.
This shelf sits on the far right wall and it was much needed for all of the fun things that were collected at baby showers! We used several styles of baskets to hold all of the soft and fluffy accessories, and accented the shelves with some new and passed-down pieces. We also used a frame that was a gift as well as a silhouette of the baby's father to finish off the top shelf!
I hope you enjoyed the nursery tour! It's newest resident made his debut this weekend!
Related Posts Plugin for WordPress, Blogger...