Thursday, April 28, 2011

DIY Wreath Project! Warning: I am putting more moss on things!!

I am happy to announce that my Moss Letter Door Hanger made it through several days of tornados, wind, rain, etc!  It looks as good as new!
After that project, I realized that my side door needed some love. I thought that since the moss project was so easy, I would try it again! I have wanted a rectangular wreath for a while now, but couldn't find one. This prompted me to make one myself...which is usually what I end up doing for every specific thing that I want.
First, I cut out a one day 50% off coupon to Michaels, and picked up a moss table runner.  It was $15, but only $7.50 with the coupon!  I then picked up a large sheet of floral foam from Hobby Lobby.
I cut the piece of foam in half (you can do this with a knife), and then traced out a wreath and cut out the middle. I apologize for not having pictures of this, but sometimes when I get going, I forget that you might want to know how I did it! This step was really easy though so you shouldn't have a problem.
I then covered it in the moss using the same technique that I used HERE.  So easy!
Next, I stole a scrap piece of wood from our work shop, whipped out my acrylic paint, and gave it a good coat of hot pink. I waited for that to dry, and went over it with thin coats of white, for a more antiqued look.
Next, I used a stencil that I already had, and some white acrylic paint, and stenciled that onto the center of the wood.  Once again, there are no pics of the actual process, but it's pretty self explanatory.
Below is what the wood piece looked like once complete! You could use any style of stencil, and I usually go for something a little less ornate, but this is what I had on-hand from THIS glass etching project.
I know the picture is not great, but I tried to show how I attached the wood to the wreath. I had two holes drilled in the wood, one on top and one on the bottom. I then went back to my box of ribbon, and looped a thick, white ribbon through the whole.
I knotted the bottom one right behind the wood, and the top ribbon right where the wreath would hang on a nail, since I am using the ribbon as the hanger as well.
Here is a view of what it looks like all put together from the back...it should give you a better idea of how I attached the ribbon. I also added a fun striped ribbon bow on the top to tie in the pink color on the wooden plate.
I just stuck a nail in the wood portion of my door, and stuck it through the ribbon knot! Here is my door, all spiffed up and not feeling left out now that it has its own personalized hanger!
PS, I went inside half-way through this photo shoot when I realized there was stuff all over my kitchen counters and you could see it through the pics.  Ha!
Here is a full-door view. This little area is so welcoming now and I love how it turned out! I just kind of planned the design as I went, and this is what I came up with. You wouldn't have to use a letter, you could mix it up with a bird/cross/anything you want really! This would also be great for baby showers with a rattle and some cute pink or blue ribbon, and for the holidays with red or gold with an ornament print!
I love how it turned out, but promise that I am done covering things in moss...for now! Hope you all have stayed safe during all of this scary weather!  

Friday, April 22, 2011

Bright and Airy Living Room Curtains!

Last week I posted about the awesome fabric I found for my living room curtains. The curtains that I was using were pieces of fabric that I had new-sew hemmed. They were really dark and had been used in our previous home. 
This room has NO overhead lights (I guess in the 50's everyone wanted to be in the dark??) and it is impossible to get good light in there. Since I can't afford to have all new lighting wired into that room right now, I went for an easier solution: use bright fabric to help lighten up the space!
Here is what the room looked like soon after we moved in:
A little scary, I know... I'm really regretting getting rid of that blue carpet. That blue carpet was the FIRST thing to go!!
The next two pics show the house a few months later with furniture/drapes/rug and new paint and floors. Much better, but pretty dark. This is sadly the room with all of the furniture that we didn't have a place for anywhere else in the house (I think we all have a room like this)!

Below is the room with my new drapes! You'll also notice it is missing something...ok, everything. All of the seating is now used in other spots in the house. The smaller chair got a makeover HERE, and the leather chair is in the great room for watching TV. I have a blank slate in there now. There is a rug on the way (on back order until June but I'm being patient) and the piano that weighs about 100 tons is not going anywhere any time soon!
These are IPhone pics so I know they are still kind of dark, but you get the idea of how these drapes are letting the natural light into the room much better than the previous ones.
And what's really crazy is how our new white trim paint on the front porch makes our room brighter! Who knew!
Here is a close-up of the fabric. I LOVE it. 
Here is a view from the other side of the room. And the dog staring at his frisbee in the yard. Such a one-track mind. I usually move him out of pictures but I gave up today.
Hopefully I will have updates soon with actual furniture pieces in the room! I like the idea of "building" and "layering" a room though, so it will probably be one piece at a time. 
Everyone have a great Friday and enjoy the little patches of sunshine in between the rain!

Friday, April 15, 2011

"I'm MOSSY": A Super-Easy DIY door hanger

(Am I the only one singing that title to the tune of "I'm Bossy" by Kelis?). If so, it probably doesn't make sense to the rest of you. I would link to the video but I don't think it's safe for my blog. But enough about that. I saw THIS post on Thriftydecorchick and I thought, "hey, I can do that!" I had this big "H" that I bought at Joann's last year that I have been using in my bedroom.  But since that room will be getting a makeover, the "H" needed a new place to live. So, I give her total credit for this simple project.  Be sure to check out her blog HERE.
 I bought this sheet of moss at Hobby Lobby for a few bucks, and I went to work.
I peeled the back off and got out my glue gun. Be sure to put something down wherever you are doing this...it gets kind of messy.
I laid the letter out and cut the moss around it. I started gluing and wrapping the moss around the back of the letter.
I just trimmed off the extra and used it to fill in anywhere that the moss wouldn't completely cover.  I wanted to make sure that the front and back were covered, but you probably wouldn't have to.
This seriously took about 15 minutes. So easy! Next, I found some ribbon that I had in my random box of ribbon (don't we all have one of those?), and I hot glued it to the back. I then re-inforced it with staples.
When I put it on the door, it hung a little longer than I wanted, so I just stapled an extra loop in the ribbon, and hung it on the nail! And here it is complete! This also gives you another peek at my newly-painted house! I am not going to show the entire thing yet because my husband is making the shutters for our windows over the weekend, and I want to make sure those are up before I take the final pics. I LOVE the color of our door now! It's like a gunmetal gray and looks great with the house color!
Like I normally do, I took way too many picture of my mossy "H". But I am SO happy with how it turned out, and how easy it was!
Here is a view of it on the porch. It's a little dark but you get the idea. I have resorted to using my IPhone for all of my pictures until I invest in a new camera...I think it does a pretty good job though! We will soon be getting a new front porch light. And just ignore the awesome red tile. Hopefully that won't be with us for too much longer.
Last picture, I promise.  I'm so happy with my new front door.  Now I want to cover everything with moss!  
The total cost for this was about $10. The Pottery Barn version? $79!! Plus shipping! Craziness. You can see it HERE. Everyone have a great weekend and check back next week for some more completed projects!

Wednesday, April 13, 2011

Before and After: My side chair

I couldn't come up with a clever title so that's it...kind of boring.  It doesn't really reflect how giddy I am about the fact that my boring side chair had it's work done, spent a couple of weeks at a "spa somewhere in Arizona" (place where all of those celebs go after their plastic surgery so no one sees them with all of the bruises and bandages), and is now back with me looking 20 years younger!!
If you remember THIS previous post, my chair was showing its age and wasn't exactly the life of the party.
And here he is now!
 I may have taken a little too many pictures because of how excited I was...sorry about that.
 Doesn't he look fab??  I am trying out different pillows for him, but he even looks good without one!
 The print is perfect for the rest of the room, and I'm glad I decided not to paint the pretty wood white.  Up against the white built-ins, it would have been too much. 
I also have a couple of sneak peeks for you...
Remember THIS post about my dining curtains and having trouble deciding on fabric?  Well, I never decided on any and have been patiently waiting for some to fall into my lap.  Like that was going to happen.  I have also been eyeing THIS fabric online for quite some time now.
Do you see that price?  $24.99.  No thank you.  But today, as I walked in the fabric store to pick up my cushions, what did I see, but a roll of this amazing fabric.  And the price? $14!!!!  I literally picked up the roll before someone else snatched it from me and ran straight to the counter.
 Now it's safely at home with me, waiting to be my living room curtains.  I can't wait!
And one more BIG suprise...
Yes, this is a picture of the side of my house from the front porch.  And my trim is now white and my bricks are now grey.  We are getting our house painted!!!  It was kind of on a whim, and we just decided to go for it.  It already looks 1,000 times better.  I will be sure to share the before and afters when the job is complete.  It's like a new house!
Ok, I think that's enough excitement for today.  More to come soon!


Friday, April 8, 2011

My Photo wall is coming along...after a couple of minor detours

Once I get an idea about something, I like to do it.  This usually means staying up later than normal and making my husband drill or screw or nail something into the wall.  But I like to see immediate results. 
My wall is almost complete but there were a couple of casualties in the process.  Like this:
Picture me making a sad face when I saw this all over the couch/floor.  On its way down it took out a couple of other frames which now no longer have their glass.  I was pretty devastated.  But as you can see, I am determined to glue this guy back together.  I'm going to try to spackle the cracks and then spray paint it.  We'll see.
So after a few minor adjustments to my plan after the "jumper" took himself out, this is what I came up with.  I will say that the incident caused me to use a few screws for the heavier frames, and stick with my plan for the velcro strips for the rest.  I just don't trust those suckers to stay stuck up there, and the brick makes the sticky stuff a little less adhesive.
I used a mix of old and new photos of both family and friends to fill up the frames.  You'll notice that the two largest frames are still empty.  That's not some kind of abtract art.  I just don't have anything for them yet.  It's a large frame and I haven't decided what (if any) pictures I have that deserve to be that big and in your face.  Maybe this guy:
I know everyone always thinks their kid is the cutest, but I'm convinced mine really is...
I'll leave you with that adorable face today and I'll be sure to update you once I figure out what is worthy of the large frames!

Wednesday, April 6, 2011

Photo Wall: Making the most of an awkward space

In our great room that we have been slowling re-vamping to make it our own, there are some pretty awkward spaces.  I have tried to fix them and make them as un-awkward (is that a word?) as possible.  For instance, a random wall with a huget closet sticking out that we turned into a fully functional wall of built-ins. 
This brings me to my next hard-to-deal with wall, the brick one.  When we moved in, I painted it the same color as the other walls because it was already painted a gross lovely cream color and there was no way to showcase the actual brick.  The main problem with this wall is the small and awkwardly placed window into the kitchen.  This room was an add-on and used to be the backyard, so at the time, a window from the kitchen to the backyard made sense.  Now, not so much.  Here is the wall:

What promted me to address this was:
a: I thought my dining room needed this tree picture more than the great room
b: I have wanted to do a picture wall for a while
c: THIS post at Younghouselove.com put me over the edge and gave me the inspiration that I needed

So, I am tackling my awkward wall with a large picture grouping and I thought I would show you the process.
I still have a few frames to purchase to sit under the window, but you get the idea.  I really think this will help balance this space and the weird window will make more sense.
I used whatever papers/magazines I had laying around to test the size of the frames that I had for the space.  I just taped them up with painters tape and moved them around a bunch.  These are all frames that I have at home. I wanted all of the frames to be white, so any that weren't, I just hit with a round of spray paint. 
I am also throwing in a few thrift store finds that I have been holding on to for a while like some cameo-like profiles that I scored a few months ago.
This is what my entire room looks like right now.  Frames everywhere.  And yes, my cats managed to make it into just about all of these pictures.  I get tired of moving them out of the way so hopefully you can look past them.
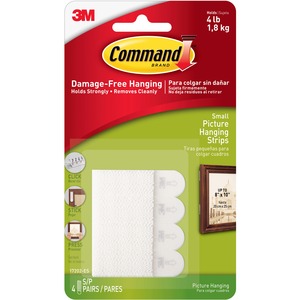
As to how I am attaching them to the brick, don't worry, I'm not planning on drilling dozens of holes and screws into the wall.  I am using these:
I can get about 4 strips for around 4 dollars.  They stick to the wall and the frame and can be adjusted because they velcro the 2 surfaces together!!  It's perfect!  And one strip holds about 4 lbs so it should work just fine.  I'll be sure to post pics of the final results once I'm finished!
Related Posts Plugin for WordPress, Blogger...