Monday, February 21, 2011

DIY Valentines Dinner

Last week, I was asked to help stage/decorate a table for a Valentines dinner for 12.  The host wanted a party that was elegant but kind of whimsical at the same time...just not taking the holiday TOO seriously.  So we went to work on some ideas and I wanted to share a few of them with you as well as the final result.  We were really just focusing on the table area as the rest of the house sort of speaks for itself.
For place cards, we bought blank folded cards and scrapbooking letters in a pink sparkle finish.  These were only a couple of dollars a set at Michaels, and worked perfectly.
Here is one of the placecards...so easy!  For the flowers, we used simple inexpensive glass vases and lined 3 of them up along the table.  The roses came in bunches of a dozen, and I used two dozen for each arrangement.  I simply cut the stems to size and added filler where needed.  Much less expensive than ordering them from a florist (and belive me, I am NOT a florist!).  Here is a better shot of one of my arrangements:

For napkin rings, we wanted to bring in the whimsical idea, so at Michaes we found sparkly heart "ornaments" (I guess for someone decorating their Valentines tree??  I have no idea).  I just cut the string off and had instant napkin rings for 50c a piece!
I placed inexpensive red and clear votive holders around the table to add some color and mood lighting.  I scattered some fun XOXO confetti around the table as well to make sure we weren't getting too serious.
The host had red dining chairs to start with, so that was great for the occasion, but her dining table did not fit 12 (who's does?).  So, four folding tables and four plain white table cloths did the trick!  Who would know?!  We had to use four folding chairs to accomodate for the crowd, and I tied red sashes on those chairs so they wouldn't be such sore thumbs...I think it turned out pretty well.
The final touches were the host's own beautiful china and silver pieces as well as two amazing silver candelabras to sit in between the arrangements of roses.  The final result was stunning!
This just goes to show that a little creativity and some DIY skills go a long way!
I also even found a use for the left-over greenery from the rose bouqets.  We turned it into a simple but elegant arrangement on a side table.
The party was a huge success and everyone loved how great the house looked!  Hopefully this will inspire you to throw some fun DIY parties of your own! 

Friday, February 18, 2011

Ikea Frame makeover/Accessorizing my linen press

During my last trip to the thrift store, I found these 3 Ikea frames.  They had never been used and were still in the packaging.  They were a little scratched up but nothing that couldn't be fixed!  I was so excited about these because I had been looking for frames exactly like these but in gold and I knew I had some gold spray paint at home, so I snatched them up!
I knew I wanted something to sit on my linen press under my new mirror that I DIY'ed HERE to add some color, and these frames are just simple enough to not take away from the mirror.  So I took the frame apart and removed the plexi-glass, spray painted it, and put it back together with just a little watercolor I whipped up to test out color in that spot. 
Here is the frame with its new gold finish. I used some of my white accessories that didn't really show up enough in the built-ins.  I took the covers off of some of my books that all had similar color schemes and stuck them up there too.
So far I really like the color that it is adding in that space and how the orange complements the blue shades.
(Sorry, I forgot the flash) I think I hung my mirror a little too high, so I will probably be lowering it soon.  And honestly, I will probably change these accessories out several times, but it is definitely a start!

Wednesday, February 16, 2011

An easy way to customize your bedding

In the Fall, I purchased some new bedding for one of my guest rooms.  It originally had just a white down comforter with a white quilt and some cute pillows that I threw on there to spruce it up a bit.  This is what it looked like fairly soon after we moved in:
Not bad, but I was totally over blue and brown, and was ready for a change.  So when I was browsing the Pottery Barn outlet here, I found this Olive Branch bedding for 75% off...seriously, it was a steal.  I thought it would be the perfect way to warm up the bedroom a bit and introduce some new colors.  The grey/blue that I have on the walls is in the print, so it was perfect!

I'm usually not one for matchy-matchy bedding, but I had some ideas for incorporating other prints into the room, so I snatched it up!
After looking at fabrics for a while, I found this great chevron print by Premier Fabrics that I LOVE.  It is close to the wall color and is large enough not to over-do the whole print-on-print thing. 

We have a store here in town, so I picked up a yard.  I made 2 Euro Sham type pillow covers, and kept the backs solid white.  This way I got the most bang for my buck by only buying a yard of the prints.  I used the same method for making the covers that I used HERE.
I think that they add TONS of character to the current bedding, and I love the print!
Please ignore the way-too-large lamp shades and the plastic that is on them!!  They will be replaced soon, they were just there for practical purposes.  And speaking of the lamps, I got them at LOWES!  I know, right?  But they are white glass and I love them.  They will have appropriately sized shades on them soon enough!
I also have plans for new drapes in the near future...maybe something crisp, white, and airy.  The current ones are the color of the walls and they make me go into grey/blue overload when I walk in there.  I'll let you know what I come up with.
Here is a close up for you of the pillows.  I think they add a lot to the bedding and keep it from looking so bed-in-a-bag.  And the down inserts were $12 a piece so $24 plus $9 for fabric is pretty great for 2 huge pillows! 

Friday, February 11, 2011

Dining Table Progress!

I posted recently about my dining room doing a little "growing up" and my plan for that.  You can read about that HERE, as well as get some tips to follow when selecting your own table.  Well, we now have one piece of the puzzle completed!!
Here is my table, all stained and pretty!
I LOVE the claw feet and how great they look with the dark stain.
It does have red undertones, but is not quite as red in person as it is in the picture.  I love how rich the wood looks with the stain.  And for around $10 for stain, the table comes to a grand total of $20!  Not bad considering my inspiration HERE!
I am now moving on to chairs, and am thinking something along these lines, no arms though:
I like the lines on the chair backs and I am thinking something in a white finish to contrast with the table.  I'm not sure i want an upholstered seat.  So maybe something more like this:
Since I didn't spend much on my table, I don't want to spend a fortune on my chairs either...if anyone has suggestions I am open to where to get the best deal on dining chairs!  And I am practically stalking Craigslist hoping that some will jump out at me!
And since my table has a leaf to accomodate 6 people if needed, I am also going to purchase 2 side chairs to sit at the head of the table when it's at its full size.  When they are not at the table, they will live in my living room in front of my front window, so I want them to be soft and comfy as well as functional.
This is an old picture...the leather chair is gone and my table accessories have changed, but you get the idea of where they will sit, flanking the window. I am looking for something along the lines of these:
Or these:

I can already tell I'm going to have trouble deciding!!  Help!
Once the chairs are selected, the final piece would be a new rug, since the one currently there is a little small and dark.  It will probably end up in a spare bedroom.
Anyone have an opinion/suggestions on chairs?  I would love your input!

Wednesday, February 9, 2011

It's a snow day here so you get a quick tutorial in Picture Hanging 101

This is what it looks like outside of my house as I sit here in my comfy chair and do a little blogging:
Yes, I live in Memphis, TN and this is the 6th time this year that it has snowed!   Crazy!
In about 2 and 1/2 hours there are already about 2 inches on the ground. 
So, since I know I'm not the only one snowed-in for the rest of the afternoon, I thought we could have a quick lesson in picture/mirror/etc... hanging.
Lately, many of the homes that I have been in (and by been in, I mean for work) have had a common theme, bad picture placement.  Whether it is a large pic in a small space, or the picture is too high/low, it always seems to be something. 
There are a few simple rules to remember when hanging things on your walls. 
First, a picture needs to be (if at all possible), hung with the center at around average eye level (around 57 inches).  For me, this means a little above eye-level since I'm a shorty, but you get the idea.  This will help you when you have different sizes and shapes of frames and mirrors in your room.  Keep their centers the same and you will "have harmony among your hangings" (there's a little alliteration for you).
If you have a picture grouping, the same applies.  Keep the center of your grouping around eye level. 
Here is an example:
This is the art that sits over my couch.  The center is at about 60 inches, which is perfect for the space.  Now, if you have very tall ceilings, you might need to adjust this a little, but if it seems awkward, it might be the size of  your picture, not its placement.
This also brings up another point.  My couch is very low, so the picture sits higher than normal in relation to the back.  However, you want to try to keep art between 6-12 inches above the top of whatever furniture piece it is hanging over.  Again, this can vary if you have a very long piece of art, or a lower-than-usual furniture piece, which is the case here.
Now that you know the correct height for your pictures, you need to know where they go in relation to your wall.  It is always best to center pictures on whatever wall you are hanging them on.  Or, if it is a strange space, center them on your furniture piece, like your couch or buffet.  As for size, it is best to leave at least a foot on each side of your couch.  You don't want a piece that overpowers the furniture you are placing it over.
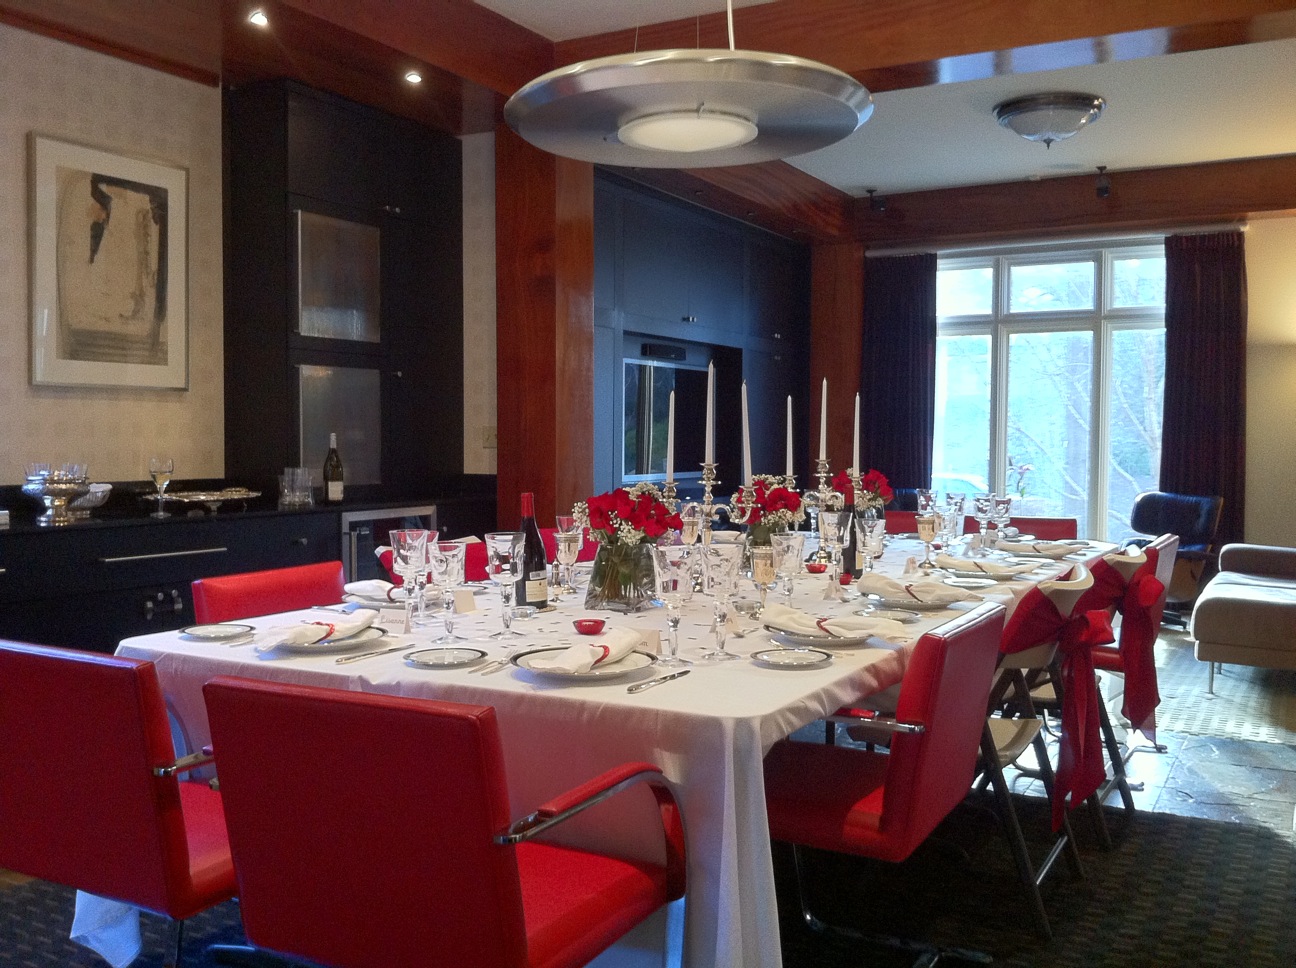
Here is an example of correct size/centering of a piece over furniture:
The mirror is not too large and is centered over the furniture, which is centered on the wall. 
Here is a straight-on look:
Like I have said before, I have been told that I have a problem with having everything symmetrical to the point of being a smidge OCD, but I don't think that's such a bad thing...
Regardless, hopefully this helped those of you who might not have been sure exactly where to hang that new piece of art or mirror!  Stay safe if you are in one of the snowy areas of the country and enjoy your bread and milk sandwiches!!  Ha!

Monday, February 7, 2011

Curtain panel to pillows!

I have been looking for blue fabric or blue pillows to go in my great room for a while now.  I wanted to bring in the same blue on my couch that I have in my lamp shades and in my art.  I also wanted the fabric to be richer than the cotton fabric on the rest of my pillows.  I was having trouble finding exactly what I wanted though.  When walking by the sale shelf at target recently, I found these curtain panels on clearance.
They are lined with thinsulate and are very fluffy.  The color was perfect and the price was right for me, so I picked up a panel.
You can see the 2 layers of lining here.  They make the pillows so comfy!  Excuse the un-manicured fingers!  I just measured out what I needed and made basic pillow covers.  I used old throw pillows that I wasn't using anymore for the stuffing.  I also have enough fabric left for 2 more pillows if I need some elsewhere!
Here is the finished product.  I spent $20 on the curtain panel and used about half of it.  The pillows I already had, so that comes out to about $5 a pillow.  Not bad!
I love how they are pulling the blue from the picture and the bold color that they add to the couch.
They also help tie-in my lamps to the rest of the room.  I love how searching for the right color paid off!  And yes, I know that's a lot of pillows...I love throw pillows and I'm not ashamed.

Tuesday, February 1, 2011

Sunburst Mirror makeover...yes, another mirror.

Another thrift store find that was hanging out in my garage was a sunburst mirror that I found for $3. Now it definitely needed some imagination, but I was willing to give it a try. It was just a plastic framed mirror with 80's-ish southweastern coloring. Pretty hideous. But I saw potential.
This is the mirror in its original form. Note the awesome blue/mauve/cream coloring.
Here is a close-up picture of how ugly it really was. I really can't believe I even paid $3 for it.
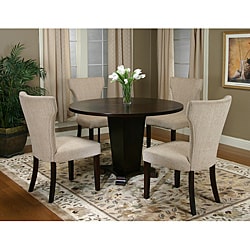
But I have been keeping my eye out for something similar to the mirror in this picture that I saw in the Decorpad post HERE.
I used the same antique-gold painting technique that I used for the large mirror in my previous post, and it gave it new life!
Here is my mirror after! Of course it is a far cry from the one in the picture, but for $3 and for a similar effect, it was hard to pass up! I would like to have several of these eventually including one in my bedroom, but for now, this one is hanging out in the formal living room.
I love giving sad, outdated things a new life! And fun mirrors can liven up any room in a second!
Related Posts Plugin for WordPress, Blogger...