In our great room that we have been slowling re-vamping to make it our own, there are some pretty awkward spaces. I have tried to fix them and make them as un-awkward (is that a word?) as possible. For instance, a random wall with a huget closet sticking out that we turned into a fully functional wall of built-ins.
This brings me to my next hard-to-deal with wall, the brick one. When we moved in, I painted it the same color as the other walls because it was already painted a
gross lovely cream color and there was no way to showcase the actual brick. The main problem with this wall is the small and awkwardly placed window into the kitchen. This room was an add-on and used to be the backyard, so at the time, a window from the kitchen to the backyard made sense. Now, not so much. Here is the wall:
What promted me to address this was:
a: I thought my dining room needed this tree picture more than the great room
b: I have wanted to do a picture wall for a while
c:
THIS post at Younghouselove.com put me over the edge and gave me the inspiration that I needed
So, I am tackling my awkward wall with a large picture grouping and I thought I would show you the process.
I still have a few frames to purchase to sit under the window, but you get the idea. I really think this will help balance this space and the weird window will make more sense.
I used whatever papers/magazines I had laying around to test the size of the frames that I had for the space. I just taped them up with painters tape and moved them around a bunch. These are all frames that I have at home. I wanted all of the frames to be white, so any that weren't, I just hit with a round of spray paint.
I am also throwing in a few thrift store finds that I have been holding on to for a while like some cameo-like profiles that I scored a few months ago.
This is what my entire room looks like right now. Frames everywhere. And yes, my cats managed to make it into just about all of these pictures. I get tired of moving them out of the way so hopefully you can look past them.
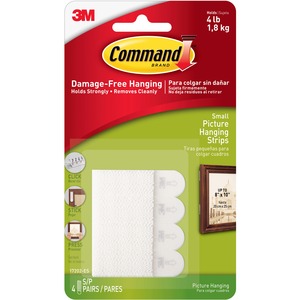
As to how I am attaching them to the brick, don't worry, I'm not planning on drilling dozens of holes and screws into the wall. I am using these:
I can get about 4 strips for around 4 dollars. They stick to the wall and the frame and can be adjusted because they velcro the 2 surfaces together!! It's perfect! And one strip holds about 4 lbs so it should work just fine. I'll be sure to post pics of the final results once I'm finished!


I've been contemplating tackling one of these myself. I love the arrangement you've put together & can't wait to see the final result!
ReplyDeleteOOOOH! i can't wait to see it... I am obsessed with Young House Love. That bright green rug they just got = amazeballs.
ReplyDeleteI love them too! I seriously stalk their blog waiting for their next post.
ReplyDelete