Wednesday, August 24, 2011

Fabric Scrap Wreath!

I have been saving links to fabric scrap wreaths as an idea for a holiday party or a shower, so when I finally got to make this myself, I was really excited!
The links that gave me the idea for this can be found HERE or HERE.

I decided that I wanted my wreath to be pretty full, so one coat hanger folded into a circle wasn't going to be enough. I went to Hobby Lobby and found a wire wreath form. None of them were super-wide, so I decided to get two sizes and find a way to connect them. These are only a couple of dollars a piece.
Here they are together. This was exactly the width that I wanted.
I also picked up this inexpensive floral wire which was right beside the wire forms. And it's amazing. It has a cutter so no pliers needed! I'm sure everyone else already knew about this nifty invention. Anyway, I just wired the wreaths together at 4 points and it seemed pretty secure, so I left it at that.
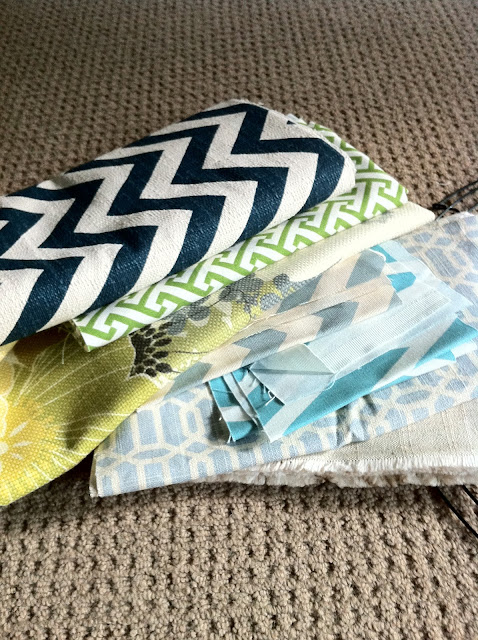
Next, I went through my fabric scrap pile and pulled out all of the colors that we were using for the shower. The great thing about this is that these are the colors that I have used all over my house!
Next, I cut TONS of fabric strips around 6-8 inches long and about an inch wide. I didn't measure or anything, so none of them are exactly the same, but it doesn't matter once you attach them. The cutting and the tying take a little while, but just do it while you're watching your favorite show, and it will go by fast! To attach the fabric, I just tied each piece to a place on the wire form in a knot, with equal parts of fabric on each side of the knot.
This is what it looked like about half-way through. There was really no pattern to how I tied them, just tried to fill in gaps where I saw them.
Here is the wreath after a couple of hours of tying lots of knots!! I wanted to personalize it so I dug around in my craft supply and found some blue letters that I had from another project.
I used tacky glue to glue the letters directly to the wreath. I just pressed each one down for about a minute, and after about half an hour, they weren't going anywhere!
I knew we would be opening gifts in front of my TV, but I didn't want a big ugly TV to be our background, so I thought the wreath did a nice job of distracting! I was so busy that day that I completely forgot to get a closer picture of it!
Here's a little closer look of how it was displayed. I just used a white ribbon that I already had and looped it around the wreath. Then I used a thumb tack to pin it to the top of the shelf. I left a little ribbon on top to tie a bow to cover the tack.
This is something they can re-use as well either at the hospital or in his room!


Monday, August 22, 2011

DIY Tissue Paper Puffs

Tissue paper puffs are an easy way to add lots of color to a space for a shower or party. They are pretty easy to make, all you need is tissue paper in whatever colors you're planning on using, floral wire, scissors, and something to hang them with (I used fishing line).
You need 8-10 sheets of paper per puff.
First you lay out the papers on a flat surface, all stacked on top of one another.
Yes, that's a dog bone...I block these things out.
Next, you fold the paper back and forth, in about one inch folds like an accordian. Kind of like how you would make a fan when you were a kid.
Once you have folded the paper all the way up, find the middle, and cut a piece of floral wire. Wrap the wire around the middle and make sure it is pretty tight. If you want a smaller puff, you can cut your tissue paper in half long-ways. This will make the puff half the size.
After you have secured the wire, use your scissors to shape the edges. You can cut them to a point or leave them rounded. Just make sure that the ends are symmetrical.
I was doing this by myself, so I didn't get a picture of the last step, but HERE is one from Marthastewart.com, along with a tutorial (that I found after I made mine!).
At this point, before you pull the sheets apart, go ahead and tie your fishing line around the center (this will make it easier to find once the puff is full).
Pull each sheet of paper apart from the others, separating them one at a time. Be careful not to rip the paper when you do this!

Once you are finished, trim your fishing line to whatever length you need it, and hang it from the ceiling, a light fixture, etc...
Here is the finished product:
I used several colors and made both large and small ones to add layers.
This took care of the space in front of the window without having a large floral arrangement to get in the way! I secured these to the curtain rod. They are really light so I didn't have to worry about them weighing anything down.
Here's a closer look

These are really fun to make and I love how inexpensive they were!

Wednesday, August 17, 2011

DIY cupcake stand

I mentioned on Monday that I would be posting soon about the baby shower that I recently hosted at my house. I am actually going to make it several posts because there were lots DIY projects involved there and I was asked how several things were created, so I thought I would showcase them one at a time.
But first, I wanted to show you my solution to displaying 40 cupcakes on a small table. I knew I needed some kind of tiered stand, but I didn't want to buy anything new just for one night. So I went through my collection of serving pieces and found 3 that I thought might work.
 This is a cake stand that I found at a garage sale, an awesome cake stand that flips over and becomes a dip tray that I received as a gift years ago, and a serving plate that I found on final sale at Pottery Barn outlet!
I tried this arrangement of stacking them and then tested it out to make sure my cupcakes would fit on each tier. It worked perfectly!
And here it is with all of the cupcakes! I was so happy that everything worked perfectly!
Here's a closer look.
So if you don't think you have the perfect serving piece, take a quick look through what you have on hand and see it you can make it work!
Next up, how to create those cute tissue paper puffs! They are such an easy way to add lots of color!

Monday, August 15, 2011

Wainscoting

I tried to think of a creative title but I gave up. But this post really is all about wainscoting. Just as a reminder, this is what our dining room looked like in between the removal of wallpaper layer 1 and 2 not long after we bought it.
And here it was when I posted about it HERE. You know, when I said the wainscoting would be completed soon. And I believe that was February or 2010. Yes, a year and a half ago.
And until last week, still no wainscoting. This was as close as it got. Painting the wood that was covering the gross teturing on the bottom half. But after completing the table and chairs HERE, I realized that the room needed to be finished so that you could start seeing pictures of other rooms each week!
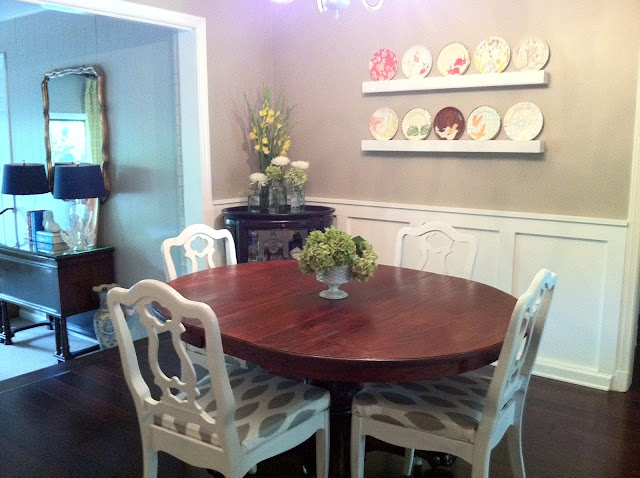
So here it is, finally, after several coats of paint. I don't have any pictures of the process, but you can check out this post HERE at Thrifty Decor Chick; the concept is the same. She used different wood and we actually removed all of the baseboards and re-installed them over the new wainscoting, where she just left hers.
It's weird how now the room feels a lot bigger, which is awesome because it is so small. This pic even has the leaf in the table because I needed it for a shower I hosted (fun pics of that to come soon!). But it still doesn't feel cramped, which is great.
Here is another shot. And yes, I have re-arranged pictures again. It's a sickness. Like my need to have massive amounts of pillows everywhere. And I didn't notice the creepy shadow my light was making on the walls until after I took the pics. But you get the idea.
One last shot.  I also think the new picture arrangement helps the room to feel longer. I am so happy that this project is finally complete! It looks so finished now and hopefully you won't have to see pics of my dining room for a while (until I move some more pictures around).
Anyone else have projects that have taken an unnecessarily long time? Please tell me I'm not the only one!
Thrifty Decor Chick

Wednesday, August 10, 2011

My first attempt at a Pinterest inspired project.

Like I mentioned a little while back, I am loving to use Pinterest as my scrapbook for ideas and inspiration. One thing I didn't want to do was pin all kinds of things and never actually DO any of them.  So when a need arose this week, I put one of my "pins" to the test.
The TV in the den was recently mounted on the wall. This meant the really awesome cheap and ugly TV stand under neath it was no longer needed. Luckily, there is a closet behind the wall that the TV is on, so it was easy to drill a couple of holes and route all of the cords to the closet. It also comes in handy for storing the cable box and anything else that the TV might need to hook up to.
For a reminder, here's the room before the TV was mounted:
 You can see it over to the left sitting up against the wall.
Here is the TV mounted.  You can see I needed something there to cover up where we routed the wires back into the room so that we didn't have to relocate the outlet. I didn't want anything too intrusive, and I couldn't find a piece at a thrift store that I wanted to tackle. That is where Pinterest comes in. A couple of weeks ago I had pinned this idea about staining crates and turning them into a furniture piece. You can see the original blog with a crate tutorial HERE. I decided to do my own simpler variation.
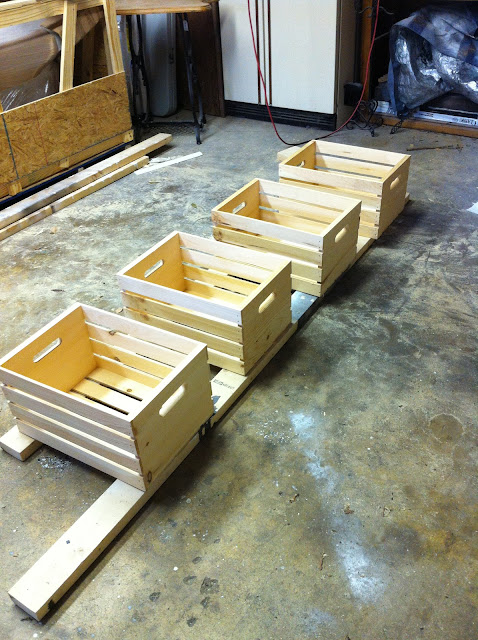
I stopped by Joanne Fabric and amazingly they had these crates for $10.99 a piece with 30% off! So I picked up 4.
I used the can of stain that I had left over from my house shutters and a sponge brush to stain the crates.
It is a Minwax dark walnut finish.
Here are my crates after one coat of stain. They took the stain really well and I decided that was all they needed. I could have done some kind of creative glaze/finish to make them look more "antiqued", but I decided not to.

Here they are stacked under the TV and covering up those ugly wires! They are the perfect height and are not too deep for the space.
And I went ahead and threw some accessories up there to see how I liked it. I can't believe how easy it was and how great it looks!
I love the new TV space and I think it is a HUGE upgrade from where it started! And the total cost was a little over $30 dollars because I had everything else but the crates. I'm excited about a successful first Pinterest project, and hopefully this will inspire me (and you) to take on another one soon!


Related Posts Plugin for WordPress, Blogger...