Showing posts with label Seasonal. Show all posts

Friday, December 21, 2012

DIY Christmas Card Wreath

If you are like most people, you get lots of Christmas cards in the mail and run out of spaces to put them pretty quickly. There are a lot of cute ideas out there, and I decided to try this one this year for my mom. I saw a version of it on Pinterest.

What I used:
 I think this totaled around $10
I made a bow using dollar store ribbon, added some retro Target ornaments, and tied it to the hoop. Then I just used clothes pins to attach the cards. So simple!


Such an easy and fun way to display your Season's greetings!

Friday, March 9, 2012

Easy, Inexpensive Ways To Freshen Up Your Home For Spring

I am so ready for my yard to start blooming, but nothing too exciting is happening out there yet. So, I made a quick trip to my go-to for easy, inexpensive flowers...Kroger. You would be surprised at their choices and how long they last!
 I picked up this bunch for $3.50. They are sitting on the bedside table that is the match for my console that I painted. This piece needs some help too (see the terribly beat up top), but it's working for now.
I used some floral foam (I keep a big square of it on hand to cut off of), and used this silver julep cup that I bought from Pottery Barn a couple of years ago. I paired that with my two PB Bunnies that I filled with Easter candy (notice how I've already eaten about half of it!!) It's a cute way to decorate for Spring without getting super-cheesy.
Adorable flowers on the cheap!

And quick side-track. You may notice a few changes...since my Great-room wall was re-constructed, my favorite mirror had to find a new home. I stuck it in the entry hall and I LOVE it there! It brightens the whole space!

I needed something under it so I stole the piano bench. I know it's probably not normal to have a footstool under your piano, but it's kind of working for me right now.

On to my second $3.50 bunch of flowers. These are brightening up the dining room. They are sitting in a cute thrift store jar. I love using things other than vases for flowers.

And my cat likes to chew on these...note the little pieces all over the table. Haven't figured out how to fix that yet. She's a big girl and gets hungry, what can I say?
Happy Friday! Now go out and get some flowers to freshen up your weekend!!


Tuesday, December 6, 2011

We're Back! Just In Time for Some Christmas Updates!

I have no good excuse for being gone so long...just lots going on and nothing too interesting on the DIY front. But I have been working on a few things that I'll show you soon! And an entire house that I will post before and afters of as soon as I get some "afters". You will be blown away by the transformation!
But for now, I wanted to show you some of my Christmas cheer that I have spread around the house. I decided to only do one tree this year (lots of construction in the master bedroom/bathroom going on and there's not a lot of extra space). So I combined my 2 normal schemes and threw in a lot of natural/rustic touches for good measure. I decided to use a lot of what I already had and incorporate a couple of new touches. Think rustic-glam.

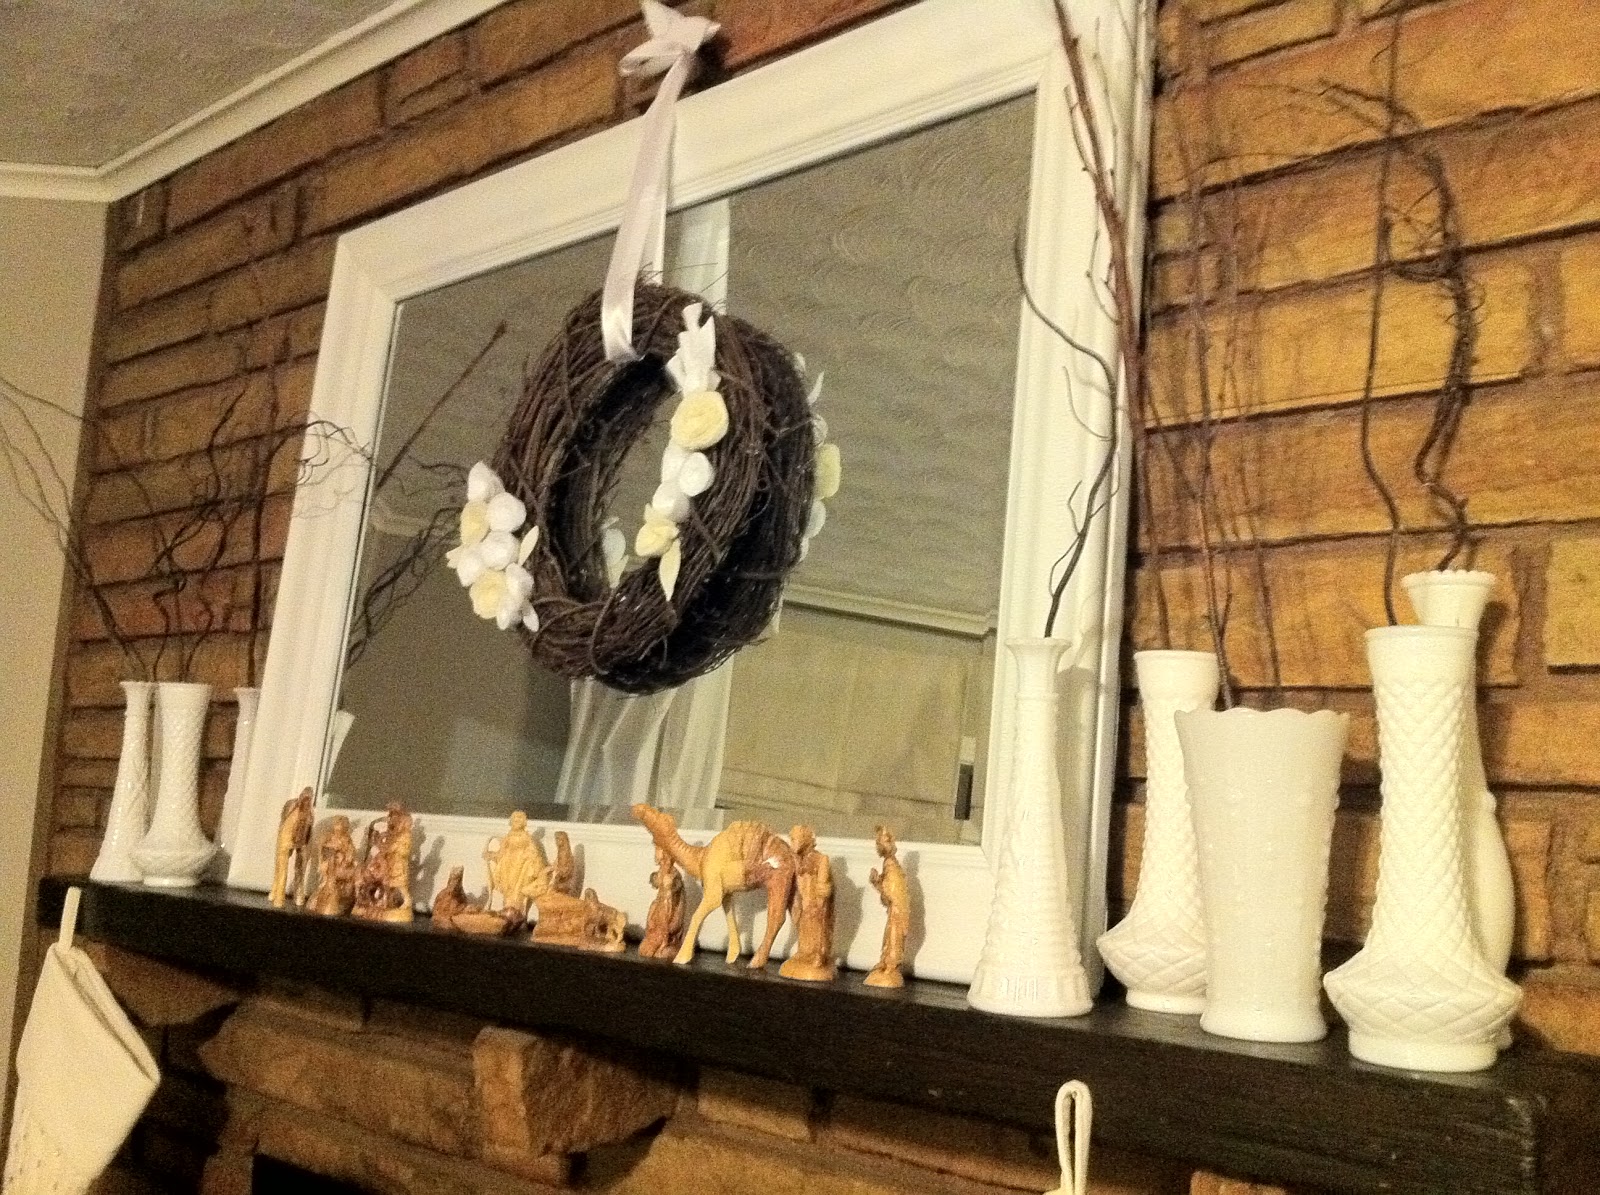
In our den we have a pretty ugly fireplace, but i just decided to embrace it this year. So I made a wreath with just a basic hobby lobby vine wreath and made some felt flowers with hot glue to add a soft touch. I used the nail above the mirror and hung it there. Then I used some of my thrift store collection of milk glass and used some branches to make a "natural" arrangement. I think these basic pieces look great with our nativity, which is hand carved wood from Israel (I think...or something close to that :)
Here is another view. And I have no idea why it's crooked...apparently I should never go into photography as a profession. Thinking of spray-painting some more branches gold and adding them to the mix... (side note: you will see gold and siver mixed all over my house...I have no problem mixing these two shinies...I think it's chic.)
Also in my den on the coffee table are these kind of rustic-silver reindeer from Target a few years back. I paired them with a McCarty Bowl from my collection (if you are a girl and you are from Mississippi, you have McCarty! You can read more about them HERE). I filled the bowl with heavy glass ornaments that I have collected over the years. I'm too afraid to actually hang them on the tree!!
I also used a table runner from Target from maybe 2 seasons ago, and I think it gives it just enough flair.
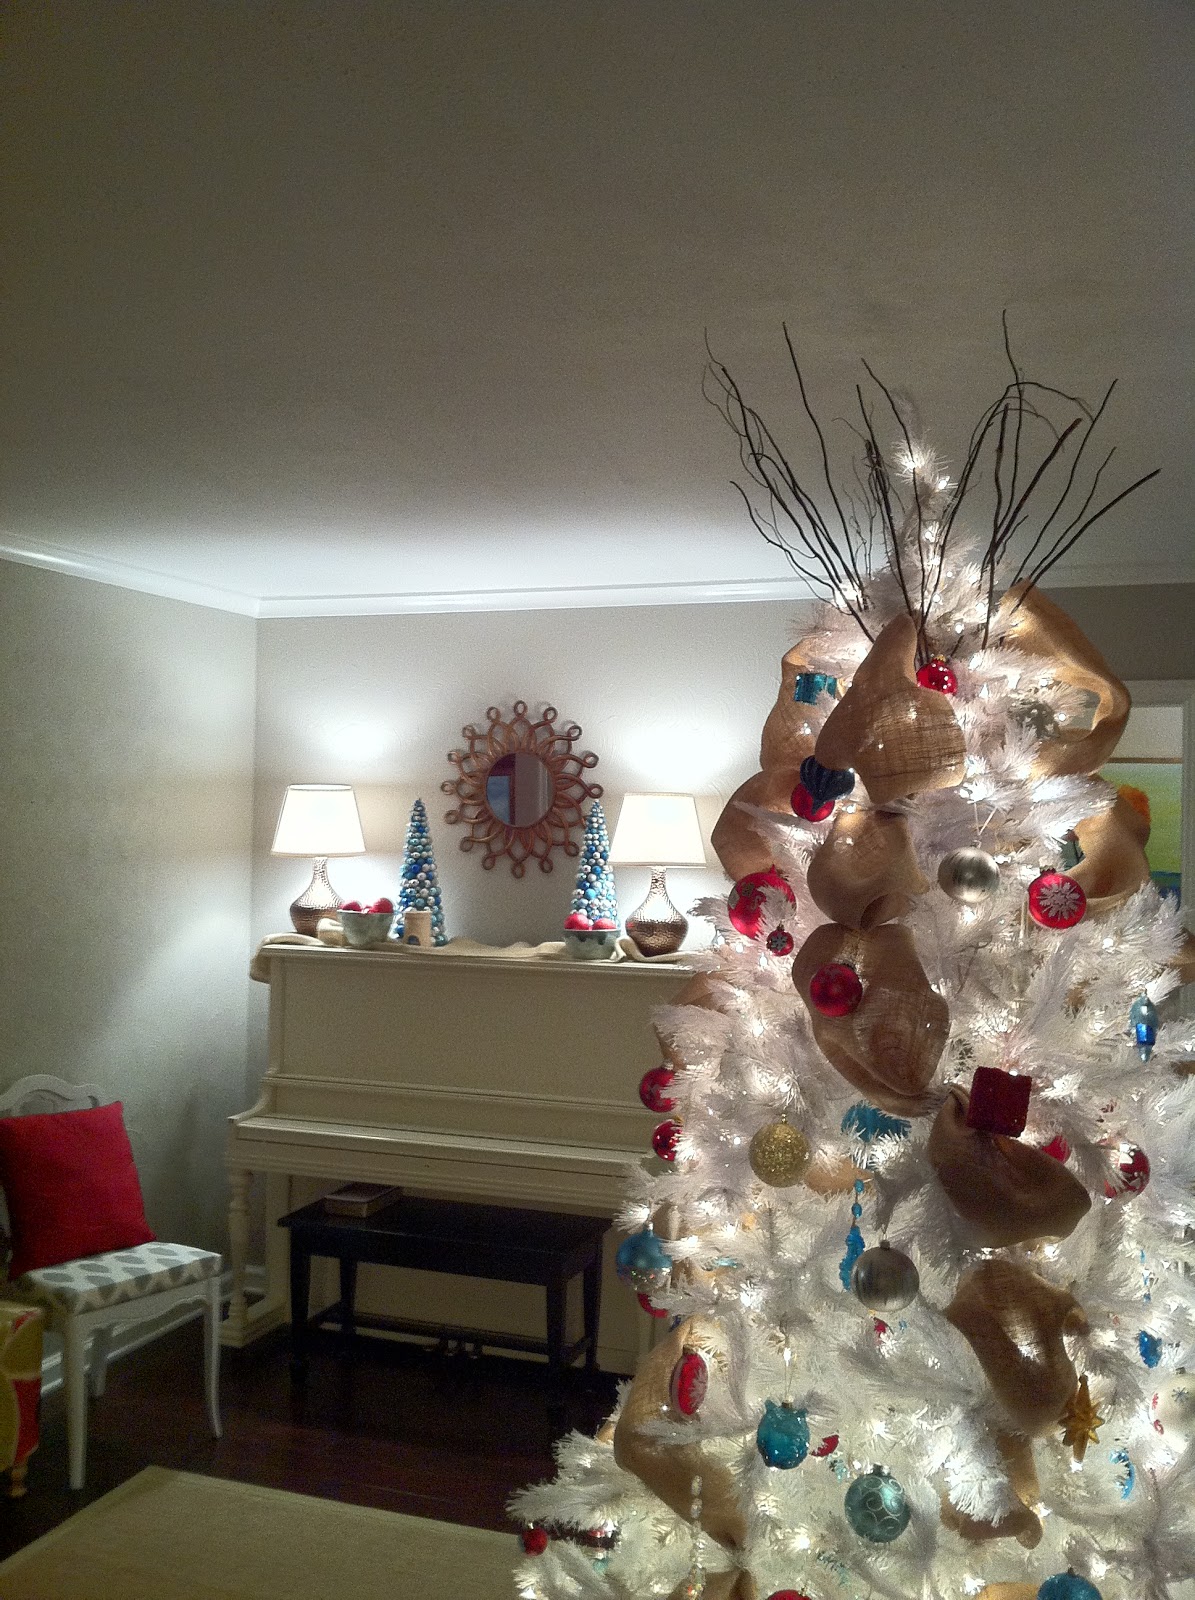
In my living room on my piano, I used these Target trees that I know are SO 3 years ago...but I still love them. I used some more of my McCarty bowls and filled them with extra red ornaments.
I also used a burlap runner that I had on my table for fall to add a natural touch.
This small nativity was the only one that I had until last year, but I love it. It was made by a close family friend, and when a candle is placed in the top, the whole thing glows. It is really cool!!
I used my white tree this year, and I combined my super-glam blue and red ornaments. One of the ways I added a natural touch, was by using branches as the topper. My ceiling really isn't tall enough for one, so I improvised with these. I really like how it turned out.
Here is the best view I can give you of both the tree and piano top. I am the worst Christmas-tree-picture-taker! I can never do them justice!! Anyone have any tips?
To bring in more of the natural/rustic feel, I used burlap instead of tulle or garland. I literally cut a few yards into thinner strips, and bunched it every few branches. SO easy!
A closer shot of some of my ornaments. I love this glass owl I found at Target last year.

Here is another room shot...I don't have a wide angle lense so this is all I got :)
My dining room, which is off the living room, got a fun and easy centerpiece...
I found a long tin, footed planter at Goodwill and 3 tall white dollar store candles. I used a dab of hot glue to secure each candle, and cut 4 small squares of floral foam to place in between each one. Then I went into my yard and found Christmas-looking plants and went to cutting.
I just stuck the cuttings in the foam, added a few extra ornaments I had left over after decorating the tree, and called it a day. I love how simple it is and how it only cost around $5.
Last view...promise! I'm really proud of it if you can't tell! And more on the cart behind it in the next post...
I'll leave you for today with my view from the den couch, which is where I spend a lot of time because that's where the fireplace is. It will give you a better idea of how everything ties together. And yes, that's my dog. More than likely if I'm on the couch, so is he. So I just embrace the fact that he might make it into a picture or two...just keepin' it real!
I'll be back soon to show you the living room and hopefully a fun and easy outdoor decor idea!


Thursday, March 17, 2011

Spring makes everything better!

It really does...as soon as it gets warm and sunny, you immediately get pulled out of that post-Christmas funk.  March Madness, NASCAR is in full swing (I might be the only one getting excited about this), Daylight Savings, flowers blooming, pollen; OK almost everything about it is great.  Spring is just what you need after a long, dreary winter, even though we only get about 2 weeks of it here in the South before it is full-blown summer weather.  So I like to begin the Spring season at my home as early as possible because it is always gone way too fast!
I thought I would share a few snippets of where Spring has made its way into our home. 
Here is my new Spring addition this year, a cute bunny from Pottery Barn (I think he's all sold out online, but I just saw a bunch at the outlet here in Memphis) that can hold anything from candy, dip, or in this case, a few eggs that I picked up last year at Hobby Lobby.  I love how he's all lounged out.  He's in my kitchen right now.  Please ignore the awesome couter tops.  Who puts pink countertops in a house???  The people before us apparently.
Here is my favorite bunny from some of my McCarty collection.  He's sitting on my den coffee table with a bowl of candy.  Side note: Andes are the most amazing candy ever made.
 This is a happy yellow bird that I picked up at TJ Maxx for super cheap.  He's on my built-ins because I thought they needed a little cheering up.
Outside I planted pansies in my two big flower pots on the front porch this weekend.  I mixed colors because I couldn't decide which I liked best!  These always remind me of college and the Tri Delta house because there were always lots of them planted along the front walk way. 
One of my most favorite things about Spring is the opportunity to use my outdoor furniture/cushions!  I bought these at Pottery Barn about four years ago for regular price.  I hardly ever buy things not on sale and in season, but I splurged.  And I will say they have held up great and I still get a lot of use out of them!  So I think my investment definitely payed off.

Hope y'all are taking advantage of the wonderful weather out there!!

Monday, February 21, 2011

DIY Valentines Dinner

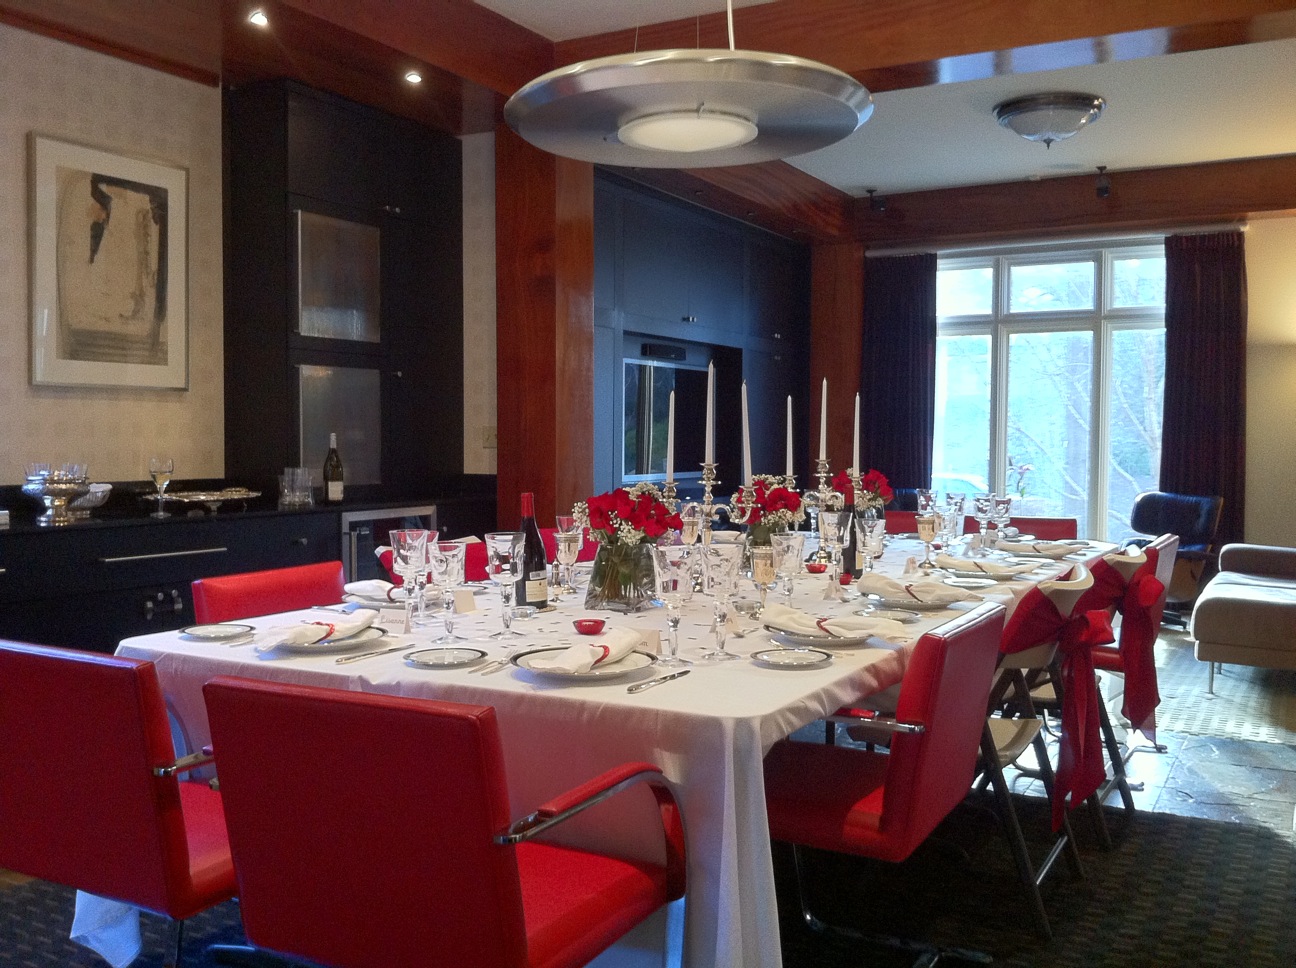
Last week, I was asked to help stage/decorate a table for a Valentines dinner for 12.  The host wanted a party that was elegant but kind of whimsical at the same time...just not taking the holiday TOO seriously.  So we went to work on some ideas and I wanted to share a few of them with you as well as the final result.  We were really just focusing on the table area as the rest of the house sort of speaks for itself.
For place cards, we bought blank folded cards and scrapbooking letters in a pink sparkle finish.  These were only a couple of dollars a set at Michaels, and worked perfectly.
Here is one of the placecards...so easy!  For the flowers, we used simple inexpensive glass vases and lined 3 of them up along the table.  The roses came in bunches of a dozen, and I used two dozen for each arrangement.  I simply cut the stems to size and added filler where needed.  Much less expensive than ordering them from a florist (and belive me, I am NOT a florist!).  Here is a better shot of one of my arrangements:

For napkin rings, we wanted to bring in the whimsical idea, so at Michaes we found sparkly heart "ornaments" (I guess for someone decorating their Valentines tree??  I have no idea).  I just cut the string off and had instant napkin rings for 50c a piece!
I placed inexpensive red and clear votive holders around the table to add some color and mood lighting.  I scattered some fun XOXO confetti around the table as well to make sure we weren't getting too serious.
The host had red dining chairs to start with, so that was great for the occasion, but her dining table did not fit 12 (who's does?).  So, four folding tables and four plain white table cloths did the trick!  Who would know?!  We had to use four folding chairs to accomodate for the crowd, and I tied red sashes on those chairs so they wouldn't be such sore thumbs...I think it turned out pretty well.
The final touches were the host's own beautiful china and silver pieces as well as two amazing silver candelabras to sit in between the arrangements of roses.  The final result was stunning!
This just goes to show that a little creativity and some DIY skills go a long way!
I also even found a use for the left-over greenery from the rose bouqets.  We turned it into a simple but elegant arrangement on a side table.
The party was a huge success and everyone loved how great the house looked!  Hopefully this will inspire you to throw some fun DIY parties of your own! 

Friday, December 3, 2010

A DIY Christmas

Decorating for Christmas can sometimes be stressful, but it shouldn't be! For me it is a fun time to unwrap all of my fun ornaments and to come up with easy ways to fill in the gaps in my holiday decor. I wanted to share with you a few easy things that you can do yourself that would cost much more if you bought similar items in the store!
I do need to start with a disclaimer: I know that I have the worst camera/lighting on the planet, so please forgive the not-so-perfect pictures. One day I will decide to invest in a new camera!
This is my "traditional" tree in my formal living room. I call it traditional because my house is a little bi-polar when it comes to Christmas decor. About half of my house is the normal red and green, but I also have lots of blue and silver, which you will see in a bit.
Just one of my favorite ornaments on this tree :)
Now, on to the DIY part...I wanted a wreath to coordinate with my tree that could sit over my mantel in the fireplace room, but I didn't want to pay a fortune. So, I went to...Wal-Mart (which will probably be my only trip there this year), and bought a bare wreath for $10! I then bought an 8 pack of ornaments for $5 and some little sparklies for $1 a piece. I got the tulle at Merry Marketplace which I mentioned in my previous post, for only $5 a roll!
Here is a close up of my wreath! It probably totalled around $20 when all was said and done. Not bad! I wired the ornaments to the wreath and I threaded the tulle through gaps and then used wire to secure them to the metal back of the wreath.
I used some of the same tulle/ornaments for a quick spruce-up of the mantle. I just used wire hooks to attach the ornaments to the tulle. Very easy and cheap!
All of this DIY decor is really helping my dated fireplace/mantel. I love how easy it all was! I was finished in about 30 minutes!! The stockings were an after Christmas clearance buy at Dillards a few years back...I think I got both for a total of $5. That's hard to beat!
Now, on to my other color scheme. I have a white tree with teal/silver ornaments in our Great room, and believe it or not, my house doesn't feel quite as disconnected as you might think...
This is my tree (with my newly made drapes, which will be another post!). Last year, I needed a wreath to go along with this color scheme, and it is nearly impossible to find one. So that is where the idea to make one came from. I did the same thing for this wreath that I did for the one on the mantel.
I decided to bunch up several of my ornaments and then used a couple of different wire ribbons. I already had the ornaments, and the ribbon was super-inexpensive, so I think the total for this one was around $15!
Here is my wreath hanging where I have yet to hang a mirror that I have yet to find :) It definitely fits there perfectly for now!
Now, on to my built-ins. They are new, so this was their first year to be decorated! I just used some white/silver tulle and added a few ornaments I already had to spruce up this top shelf. I found the ornament trees at Target for 75% off a few years ago, and the mirror was a $5 thrift store find.
I took out an additional shelf on each side and used these hurricane vases that I have had for years. I borrowed some more ornaments from the tree and filled it up. Last, and this was so easy, I took branches that had fallen in my yard, and used some silver spray paint to turn them into Christmas decor! They look like little art displays!
This is one side of my built-ins. I didn't want to go overboard and do Christmas on every shelf, so I kept it simple. And yes, I have 2 sets of stocking...these were from Pottery Barn a couple of years ago and I actually bought them at full price, but they were specially priced at $19.99 and I couldn't pass it up! I knew I would use them for years.
Here is the entire built-in, all ready for Christmas! The lights at the top really help to showcase all of the shimmery, sparkly Christmas things! I hope this will inspire you to take on some simple DIY projects that are easy and won't cost you a fortune!
Related Posts Plugin for WordPress, Blogger...