Showing posts with label Guest Post. Show all posts

Sunday, May 20, 2012

Monogram Tray DIY!

Last week, I had the honor of guest posting about my latest DIY project for Inside My Present. I thought I would share that project here for those of you who missed that post...

What I used:
A wooden tray from my closet
Acrylic paint/brush (already had)
A stencil from my craft drawer
Painters tape (already had)
A plastic cup (from my kitchen cabinet :)
 This lady had been sitting in the closet for oh, 5 or so years, and it was time I did something about it.
I decided to paint the inside of the tray to give it an updated look. I wanted to personalize it as a gift to someone, so I dug through my craft collection and got busy.
First, I taped it off and gave it a spray-paint primer coat. Once that was dry, I went back over it with acrylic paint to make sure the old image was gone. 
I love the bamboo look right now, so I decided to paint a bamboo-type pattern in gray, as kind of a tone on tone effect. I didn't want anything too bold for the print. Then I used a plastic cup to trace a circle in the center.
I did all of the painting by hand with no measuring (because I'm impatient) so it's not perfect, but lets just say that adds to the charm, Ok? :) I chose a bold tangerine for the center so that the monogram would pop.
Once everything was dry, I used a stencil that I already had and centered it on the dot. I used the white paint again to really make it stand out.
Tip: Try to remove painters tape when your paint is still a little tacky for nice lines. As for the stencil, I like to remove it immediately for the best results.
Now, for a quick reminder:
And here is the finished product! About an hour and a half total time spent, all with things I had on-hand!
Although I'm giving it as a gift, I thought I would do a little "staging" to give you an idea of how to use this easy and personlized piece!
I can just see some yummy cheeses displayed on it to pair with a nice wine!
 Fresh flowers always make everything better!
I hope you enjoyed my little project today and that it inspired you to get crackin' on some of those things collecting dust in your closet!
If you love tray makeovers, check out the herringbone tray that I painted earlier this year HERE.

Also feel free to grab my button for your blog and stop by often to see more fun projects like this!

MidSouth Stagers
 

Saturday, May 12, 2012

Guest Poster: Lauren from Inside My Present shares a fun DIY project!

I'm so excited about today's post because it is a part of Trading Blogs over at  Serendipity and Spice! Check out Inside My Present today to see my post as well!

Let me introduce myself, my name is Lauren (coincidence, I know!) and I write a little blog called Inside My Present. It's all about cooking, eating, home and garden and anything else I get myself into- truly a glimpse into my present! I am so happy to be appearing on such a chic blog as part of Trading Blogs- Lauren has already got me yearning to pick up a paint brush and hit the thrift store!

Today I'm going to share with you a craft with endless possibilities- beautiful fabric-covered picture frames. A great solution for your thrifty finds and those remnant fabrics, you can take any drab frame and customize it to match your decor or the theme of your photo. A custom frame also makes a great gift! This one is for my mother for Mother's Day- shh... don't tell!
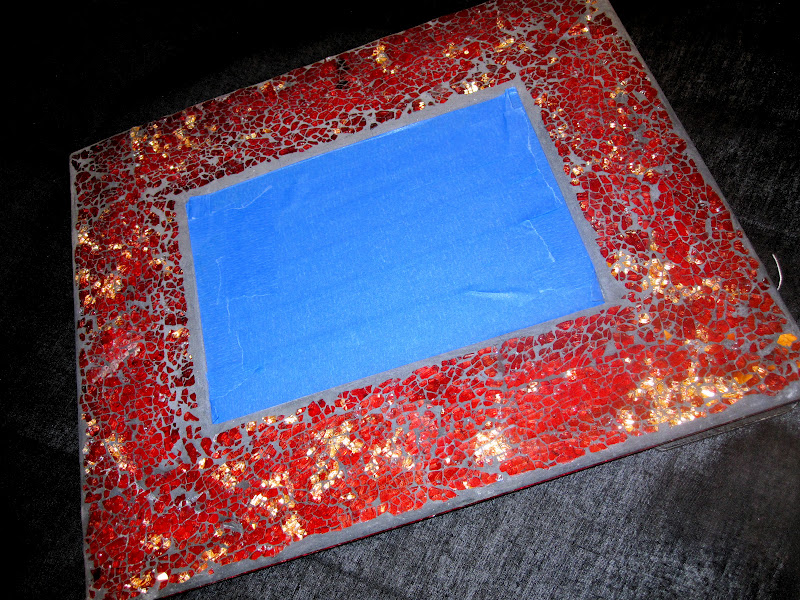
This project started with this frame that just wasn't my style. I wanted to refinish it somehow to blend with mom's decor- paint wasn't an option on the frame's mosaic surface but fabric choices were endless.  I found a beautiful pewter fabric and some coordinating accents and got to work.

Unfortunately, you couldn't disassemble this particular frame so I used painter's tape to protect the glass before spraying the front of the frame with spray adhesive. The spray adhesive worked perfectly for this project- it didn't discolor the fabric or show any lumps or bumps below.
I used an exacto knife to cut out the fabric covering the glass, making sure the edges were adhered well,  and used fabric glue to glue the fabric to the back of the frame.
Depending on the look you want, you could be done at this step! If you have some fabrics you want to showcase, they would look great unadorned and perhaps grouped together on a table. Or you could use some fabric glue to add accents of a coordinating fabric. 
You can decorate your frame with anything your glue will stick to! Have some mementos from your latest vacation? Showcase them on your frame with a photo from the trip. Use your collection of old keys, buttons or broaches- anything! I decided to decorate mine with these pretty fabric flowers I had made and some ribbon- you can read how to make the flowers here
I have a ton of nicked up frames I'm looking forward to refinishing- I'm thinking a groups of burlap-covered frames would look great! 

I hope you have enjoyed reading- thanks to Lauren for trading places with me!


How cute and creative is this project?! I love it! Make sure to hop on over to Lauren's blog to see what else she has been up to!
Related Posts Plugin for WordPress, Blogger...