Wednesday, December 28, 2011

Thrift Store Tray Makeover

I found a great little wooden tray at the new Goodwill here in Memphis a couple of weeks ago. The wood wasn't in the best shape but I loved the brassy gold handles and thought it had lots of potential.
Here is it after I picked it up for only $2.99.

I decided that I wanted to turn it into a chic piece to sit on an ottoman, and I wanted to accent the gold in the handles. I decided on a herringbone-type pattern and got to work. I gathered some black, white, and gold spray paint from the garage, some painter's tape, and some scrap paper and envelopes.
First, I taped off the center and handles, and gave the sides (both inside and out) a couple of coats of glossy black spray paint.
Next, I taped off the sides that I painted black, and used some acrylic white paint for the inside. I started with spray paint, but with the bad shape the wood was in, I wasn't getting enough coverage. Two coats of this acrylic did the trick!
 I then decided to do one row at a time. I taped off each line with painters tape, and used a piece of painters tape in between each to get the spacing right. You could also used a ruler, but this worked just fine! I then went to work with my gold spray paint to create the herringbone detail.
After spraying the first row and letting it dry, I taped off the second row, going in the opposite direction. The main thing to remember is to make sure the gold is only getting on the taped off areas and nowhere else.
 Here is what it looked like after painting the last row. I used Rust-oleum metallic finish in gold.
And here is my tray after! Hopefully this gives you a better idea of how I taped it off. Everywhere in white is where the painters tape was. I used one long strip down the side of each row to get a nice straight line in between each. It took about 2 hours total.
 Here is another view from the top. It is not 100% perfect, but I think that adds to the charm.
I threw a few accessories on top to give you an idea of how cute it looks all accessorized-up! Before really using it, I plan to spray a protective coat or two on top to keep the paint from chipping or getting damaged by glasses or whatever else it might end up holding.
Not bad for $2.99 + paint and supplies that I already had! It turned out exactly how I had hoped and I can't wait to use it!!

Wednesday, December 14, 2011

DIY Easy and Personalized Name Banner

I created this banner for a friend's baby shower this Summer, and began a post on it, but for some reason never finished it. I thought I would share it now. Just because it's Christmas doesn't mean I have to post about a Christmas DIY, right?
First, I picked up several scrapbook sheets from Hobby Lobby. These are usually between 25-50 cents a piece, and are regularly 40-50% off. I just stuck with a certain color scheme.
Next I used some brown construction paper I had in my craft bin and used a plastic cup to trace circles. I wanted to use these on each triangle of the banner to be a background for the letters for the baby's name.
I then cut out enough triangles for each letter of the name, plus a couple of extra to make sure that the banner was long enough. If the baby has a fairly long name, you wouldn't have to cut extras.


I had these left-over blue letters also in my craft bin from a project a couple of years back. I also used them for another decoration for the same shower. You can see the scrap fabric wreath I made HERE.
I then laid everything out to make sure it was turning out how I wanted. I had picked up a couple of painted wood characters at Hobby Lobby while I was there since I knew that 4 triangles weren't going to be enough. I thought the little alien and space ship were cute but not too cheesy or "baby". Once I had it looking how I wanted, I used craft glue to glue each layer of the banner. So simple!!
I also picked up some jute string at Hobby Lobby and some mini clothespins. I can't tell you how many other projects I have used that string for since.  Totally worth the couple of bucks!
I measured out the string the length that I needed it, and then used 2 pins on each triangle, securing them to the string. I then just used painters tape which I hid under my lamps to secure the banner.
I think I probably spent a total of 7 dollars for this project. And I had so many left-overs of the supplies, that I have been able to use it all for other projects here and there. I loved how it turned out and it helped personalize the shower in a cute way!!


Sunday, December 11, 2011

Easy Bench Makeover

My guest bedroom is constantly changing. I feel like my style is always evolving, and so I am always looking for easy and inexpensive ways to make changes to fit my style. The bench at the foot of the guest bed was looking a little tired, and I wanted more of a contrast. I had used left over silk fabric from the drapes to cover it originally. This bench used to be a square, brown, country-tastic coffee table with a glass middle. We cut the middle out to make it thinner and I used plywood, foam, batting, and material to make a cushion. We fused it back together in the middle. It was also painted and distressed a little.

Here is it before. 

And after. I picked up a yard of this premier fabric a few weeks earlier, and decided to use it in here. I just laid out the fabric and put the cushion on top to measure out how much I needed. Then I cut and stapled it to the the plywood all around. I did this right over the previous fabric. I am really digging coral right now and this was an easy way to put it in the room.
I had also loved this navy floral fabric on super-clearance at a local fabric store, so I got a couple of yards and just held onto it until I had the right project. I decided to turn it into pillow covers and I love how the coral in them is brought out by the bench fabric!
Here they are on the bed. They also have that silvery-blue that is throughout the room, so they go well with the Chevron covers that I sewed earlier this year. I decided to ditch the printed duvet (It is actually in the other guest bedroom now), and stick with the white on white. There have been a lot of changes in this room over the year, so I thought it would be fun to do one of those look at how much it has changed posts...
Here it is before we moved in. This pic never gets old!!! The wheel is out of control.
Here is is soon after moving in...floors needed re-finishing, and the brown and blue was cute but now looks SO dated!
Here is the bed earlier in the Spring. Those lamps ended up in my den and the shades are in a closet somewhere...pretty sure they still have plastic on them too. This is the duvet cover that is now in the other bedroom.
Here it is now! Some new artwork that I took from my bedroom at my parents, really nice black and gold lamps that someone was throwing out...so of course I took them (I added some Target shades), the floors have been re-finished (it's a little hard to tell), and a chenille rug that a friend was getting rid of. Oh, and the dog. He is such a camera hog. The funny thing is that I'm so used to him just following me around that I didn't even realize he was in the pic until I uploaded it! What a creeper.

The next change will probably involve new drapes. These were used in the apartment and weren't really purchased for the room, but they serve their purpose for now.

I hope you are inspired by how little changes can totally transform a room, and how you don't have to break the bank to do it!


Tuesday, December 6, 2011

We're Back! Just In Time for Some Christmas Updates!

I have no good excuse for being gone so long...just lots going on and nothing too interesting on the DIY front. But I have been working on a few things that I'll show you soon! And an entire house that I will post before and afters of as soon as I get some "afters". You will be blown away by the transformation!
But for now, I wanted to show you some of my Christmas cheer that I have spread around the house. I decided to only do one tree this year (lots of construction in the master bedroom/bathroom going on and there's not a lot of extra space). So I combined my 2 normal schemes and threw in a lot of natural/rustic touches for good measure. I decided to use a lot of what I already had and incorporate a couple of new touches. Think rustic-glam.

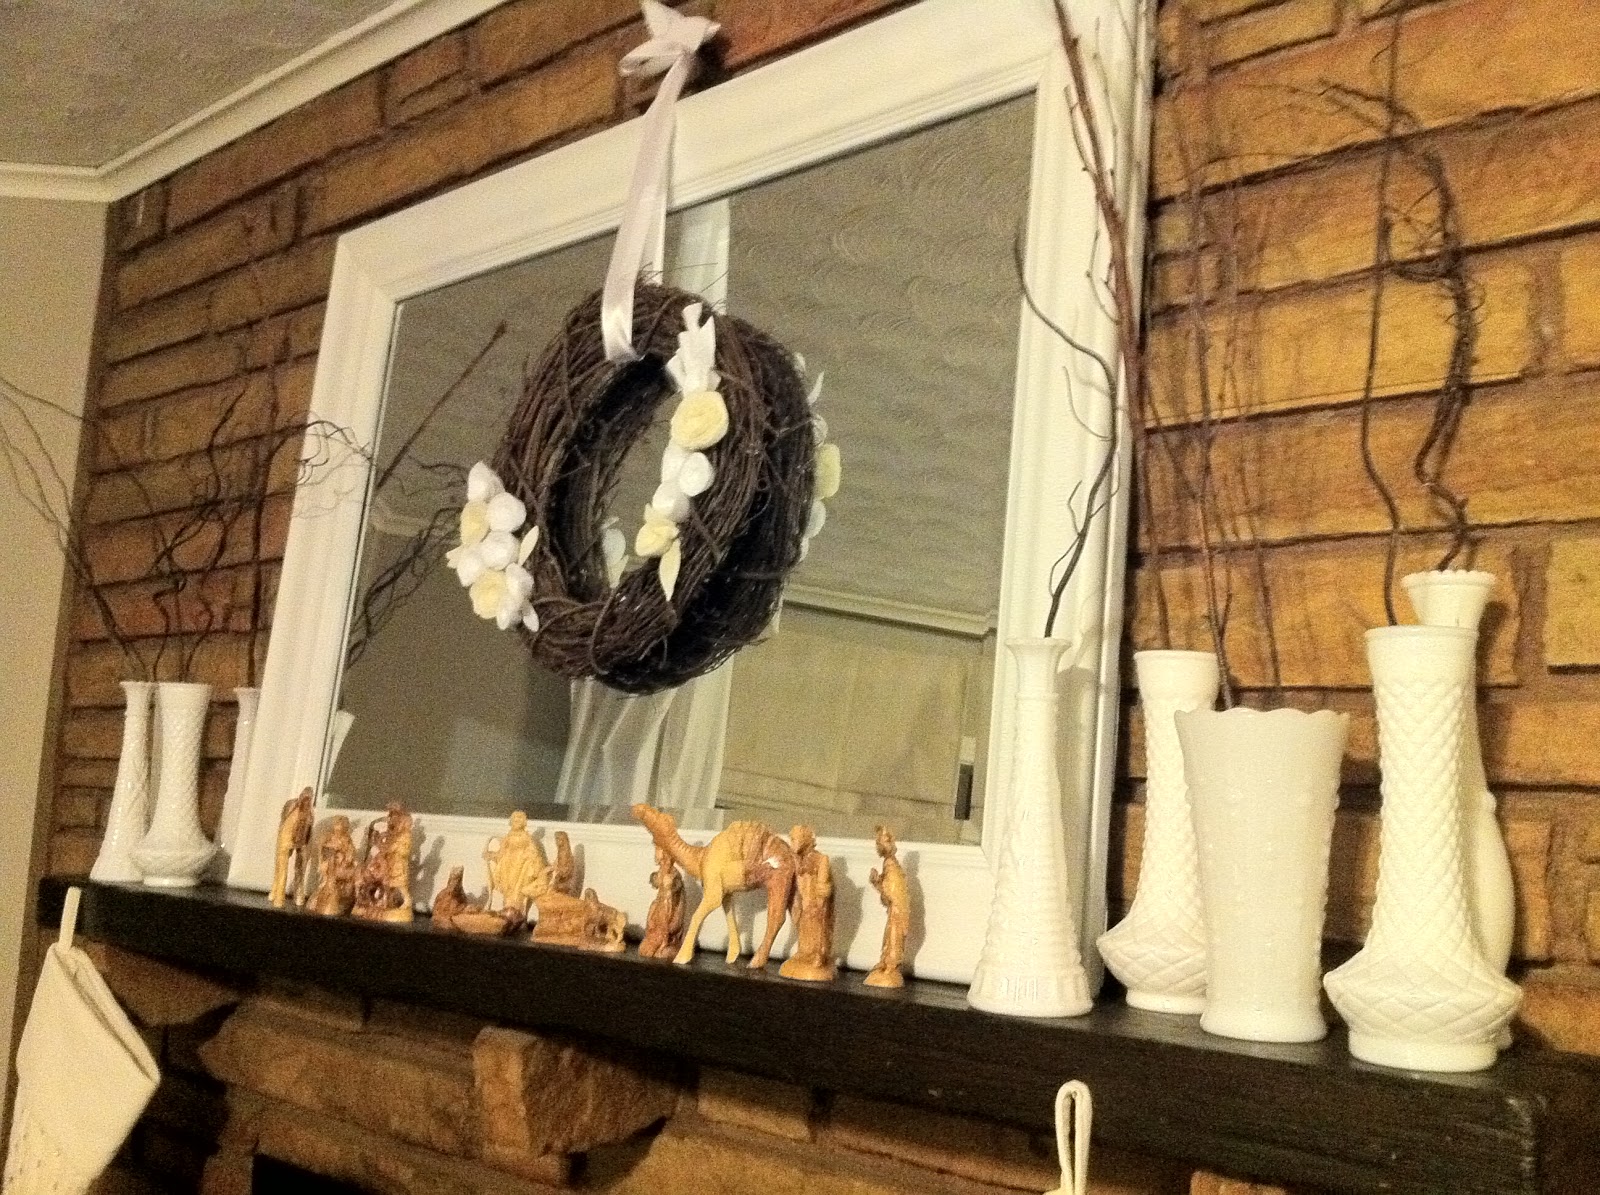
In our den we have a pretty ugly fireplace, but i just decided to embrace it this year. So I made a wreath with just a basic hobby lobby vine wreath and made some felt flowers with hot glue to add a soft touch. I used the nail above the mirror and hung it there. Then I used some of my thrift store collection of milk glass and used some branches to make a "natural" arrangement. I think these basic pieces look great with our nativity, which is hand carved wood from Israel (I think...or something close to that :)
Here is another view. And I have no idea why it's crooked...apparently I should never go into photography as a profession. Thinking of spray-painting some more branches gold and adding them to the mix... (side note: you will see gold and siver mixed all over my house...I have no problem mixing these two shinies...I think it's chic.)
Also in my den on the coffee table are these kind of rustic-silver reindeer from Target a few years back. I paired them with a McCarty Bowl from my collection (if you are a girl and you are from Mississippi, you have McCarty! You can read more about them HERE). I filled the bowl with heavy glass ornaments that I have collected over the years. I'm too afraid to actually hang them on the tree!!
I also used a table runner from Target from maybe 2 seasons ago, and I think it gives it just enough flair.
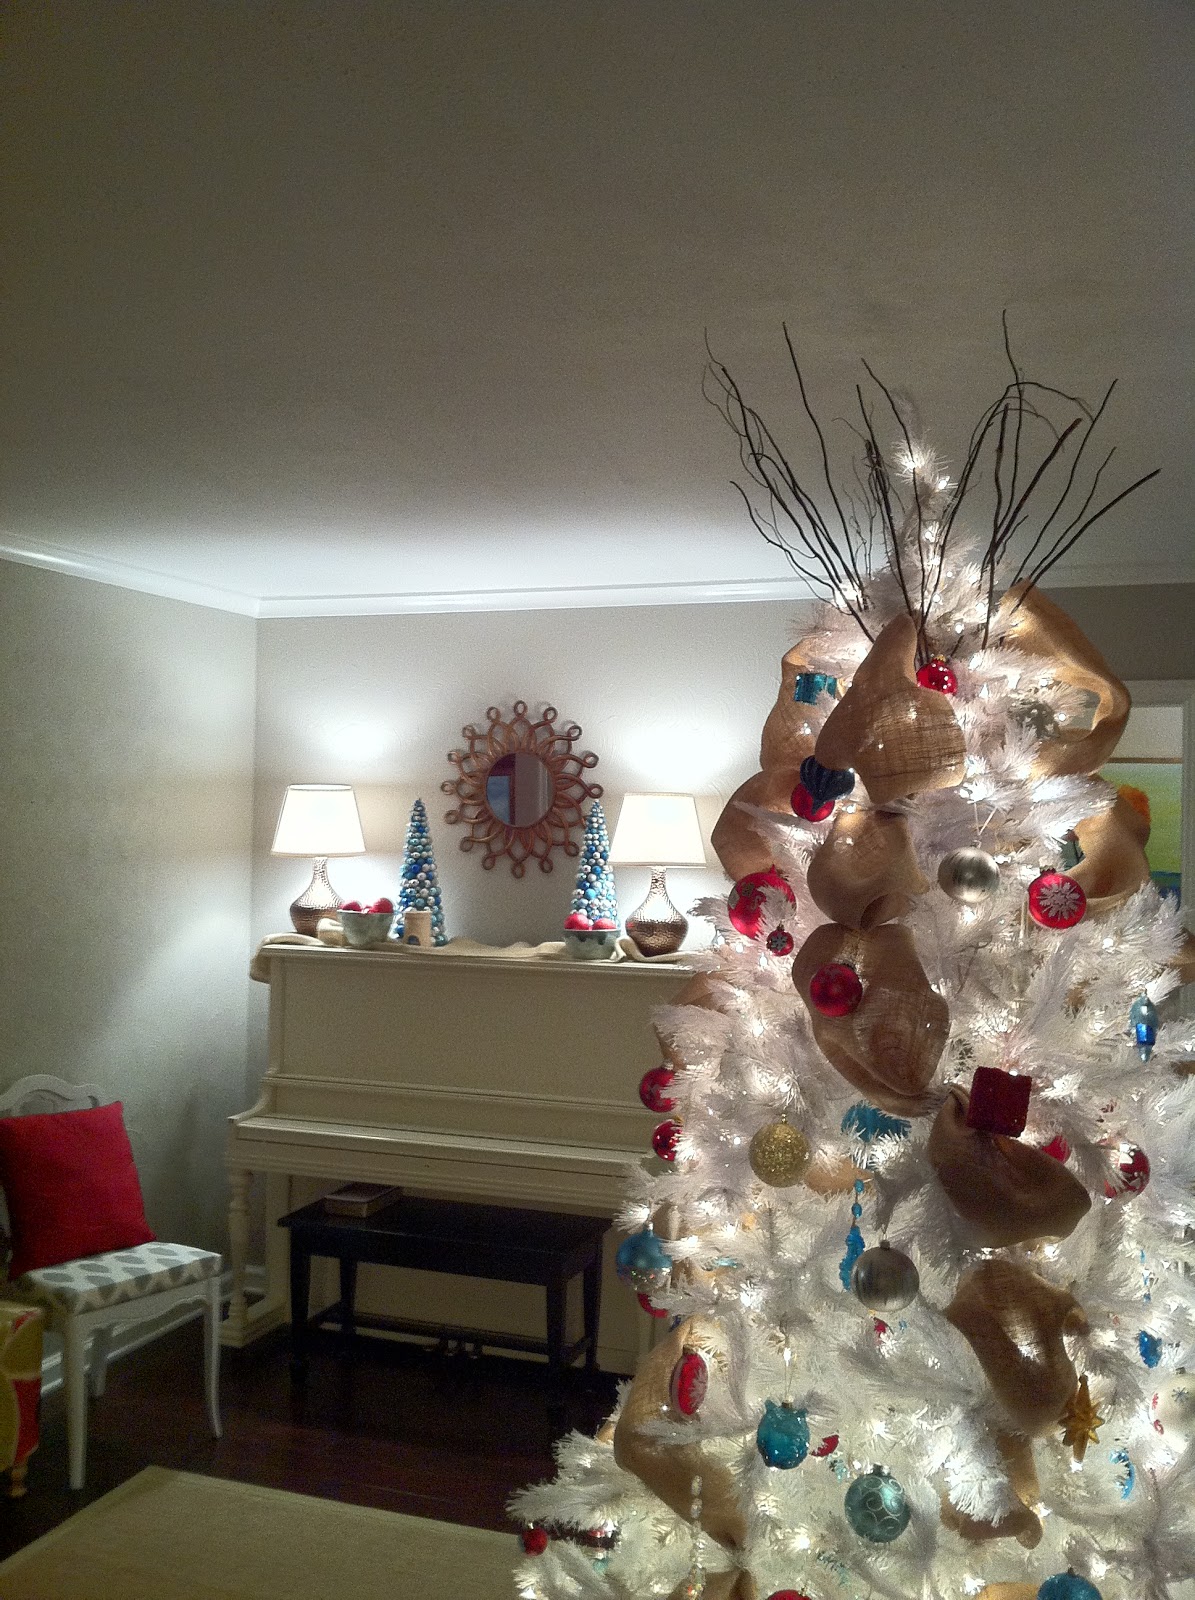
In my living room on my piano, I used these Target trees that I know are SO 3 years ago...but I still love them. I used some more of my McCarty bowls and filled them with extra red ornaments.
I also used a burlap runner that I had on my table for fall to add a natural touch.
This small nativity was the only one that I had until last year, but I love it. It was made by a close family friend, and when a candle is placed in the top, the whole thing glows. It is really cool!!
I used my white tree this year, and I combined my super-glam blue and red ornaments. One of the ways I added a natural touch, was by using branches as the topper. My ceiling really isn't tall enough for one, so I improvised with these. I really like how it turned out.
Here is the best view I can give you of both the tree and piano top. I am the worst Christmas-tree-picture-taker! I can never do them justice!! Anyone have any tips?
To bring in more of the natural/rustic feel, I used burlap instead of tulle or garland. I literally cut a few yards into thinner strips, and bunched it every few branches. SO easy!
A closer shot of some of my ornaments. I love this glass owl I found at Target last year.

Here is another room shot...I don't have a wide angle lense so this is all I got :)
My dining room, which is off the living room, got a fun and easy centerpiece...
I found a long tin, footed planter at Goodwill and 3 tall white dollar store candles. I used a dab of hot glue to secure each candle, and cut 4 small squares of floral foam to place in between each one. Then I went into my yard and found Christmas-looking plants and went to cutting.
I just stuck the cuttings in the foam, added a few extra ornaments I had left over after decorating the tree, and called it a day. I love how simple it is and how it only cost around $5.
Last view...promise! I'm really proud of it if you can't tell! And more on the cart behind it in the next post...
I'll leave you for today with my view from the den couch, which is where I spend a lot of time because that's where the fireplace is. It will give you a better idea of how everything ties together. And yes, that's my dog. More than likely if I'm on the couch, so is he. So I just embrace the fact that he might make it into a picture or two...just keepin' it real!
I'll be back soon to show you the living room and hopefully a fun and easy outdoor decor idea!


Related Posts Plugin for WordPress, Blogger...